Vendor Management System
Complete guide for vendor management. Select a topic below to get started.
System Overview
Learn about the system features, user roles, and permissions.
Accessing the System
How to login and navigate to the vendor module.
Vendor List View
Understanding the vendor list interface and table structure.
Search & Filter
How to search and filter vendor records.
Adding New Vendor
Process for creating new vendor records.
Editing Vendor Details
How to modify existing vendor information.
Viewing Vendor Details
Detailed view of vendor information and documents.
Document Management
Uploading, viewing, and managing vendor documents.
Bulk Operations
Selecting and performing actions on multiple vendors.
Address Validation
Using Radar.io for address validation and autocomplete.
Troubleshooting
Solutions to common issues and problems.
System Overview
The Vendor Management System enables organizations to manage vendor information, contact details, documents, and addresses in a centralized platform with advanced search and filtering capabilities.
Key Features
🏢 Vendor Information Management
Store and manage comprehensive vendor details including contact information and addresses.
🔍 Advanced Search & Filtering
Search vendors by name, email, phone, address with real-time filtering.
📄 Document Management
Upload, view, download, and manage vendor documents with preview capabilities.
📍 Address Validation
Integration with Radar.io for address validation and autocomplete.
📦 Bulk Operations
Select multiple vendors for batch operations like deletion.
📱 Responsive Design
Fully responsive interface with dark mode support.
User Roles & Permissions
| Feature | Standard User | Administrator |
|---|---|---|
| View Vendors | ✓ | ✓ |
| Add Vendors | ✓ | ✓ |
| Edit Vendors | ✓ | ✓ |
| Delete Vendors | ✗ | ✓ |
| Bulk Operations | ✗ | ✓ |
| Document Management | ✓ | ✓ |
Vendor Status Workflow
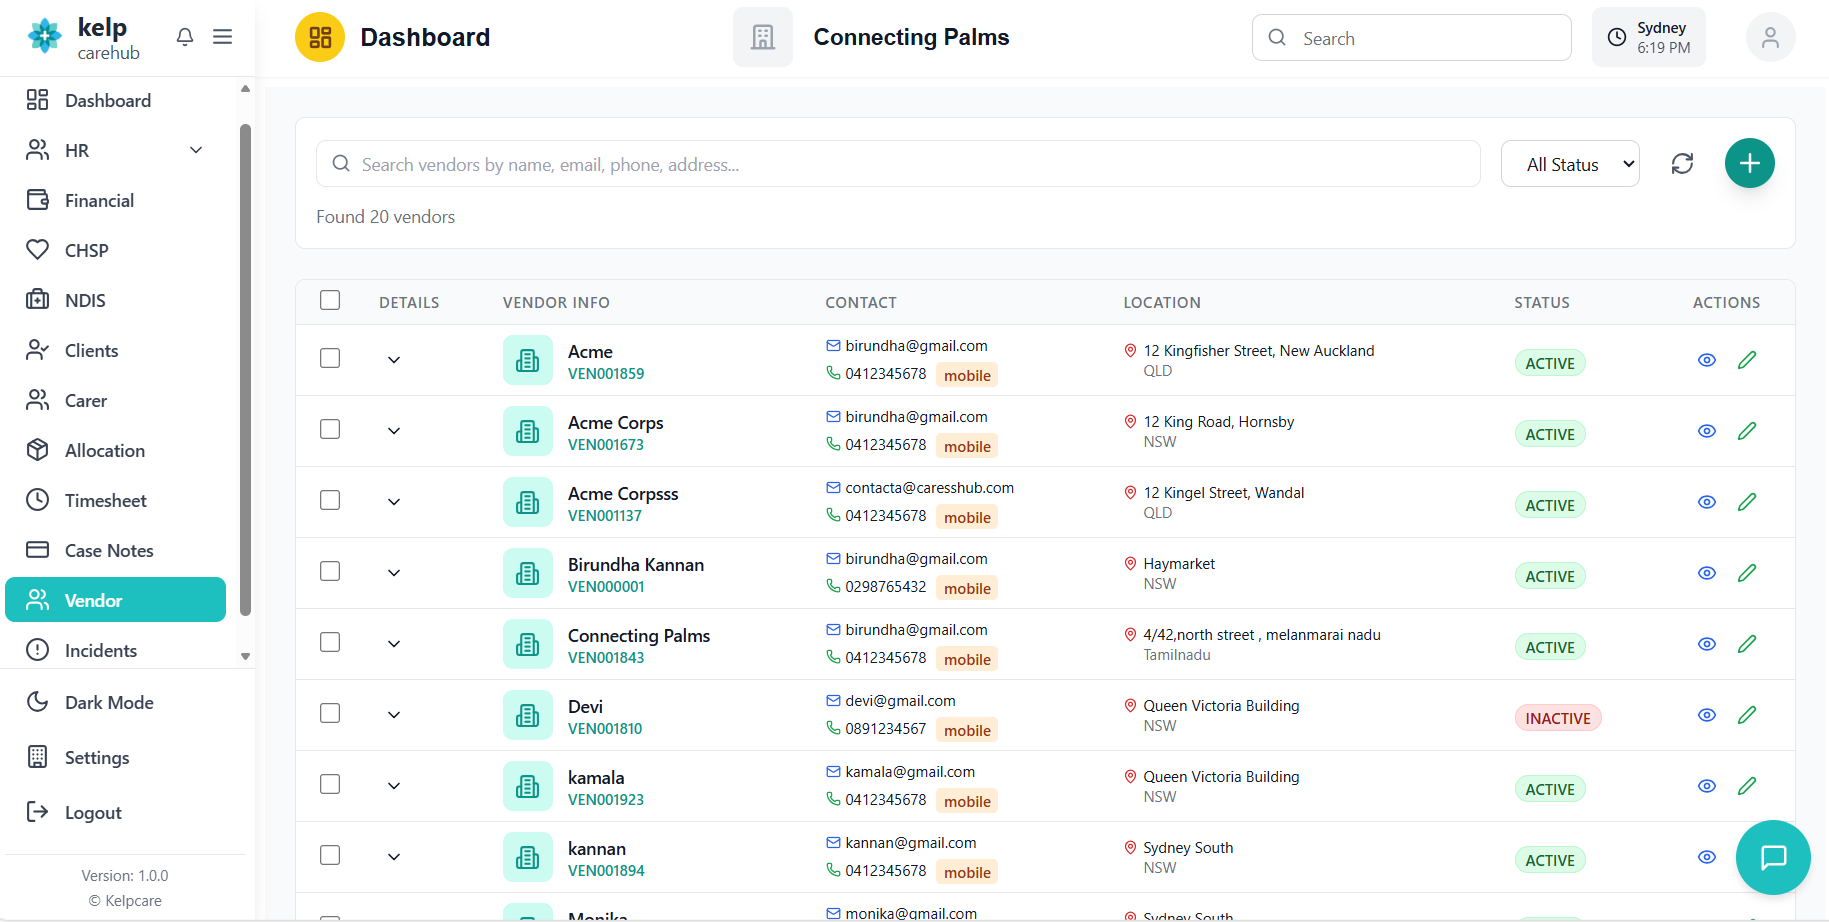
Accessing the Vendor System
How to login and navigate to the vendor management module.
- Navigate to the application URL
- Enter your credentials (username and password)
- System authenticates and redirects to dashboard

- From the main navigation menu, click on "Vendors"
- System loads the vendor management interface
- Default view shows all vendors with pagination
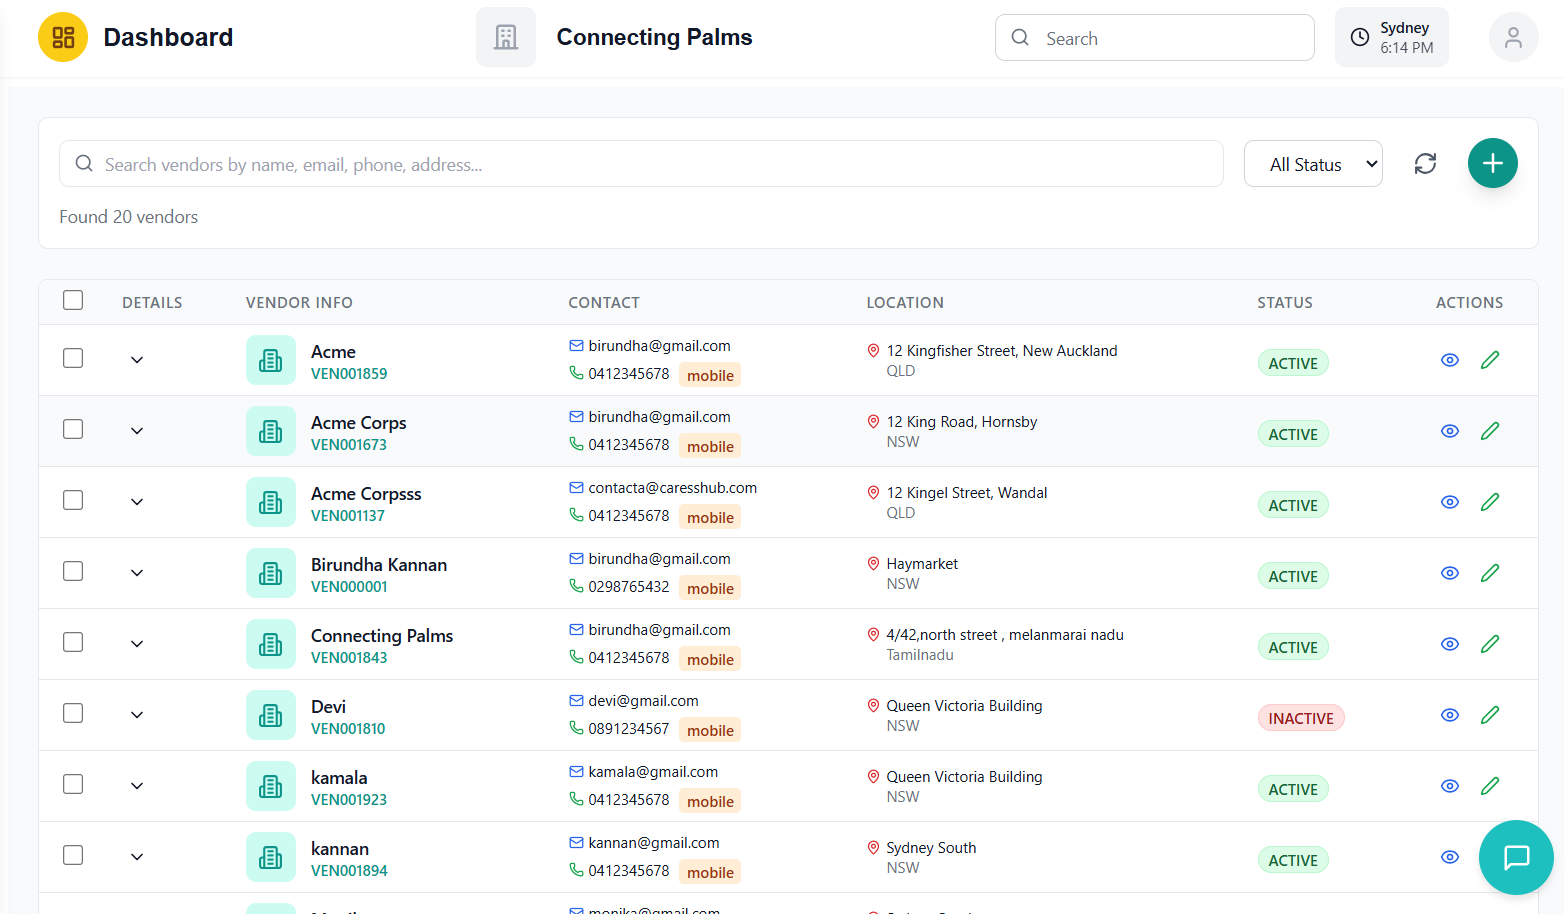
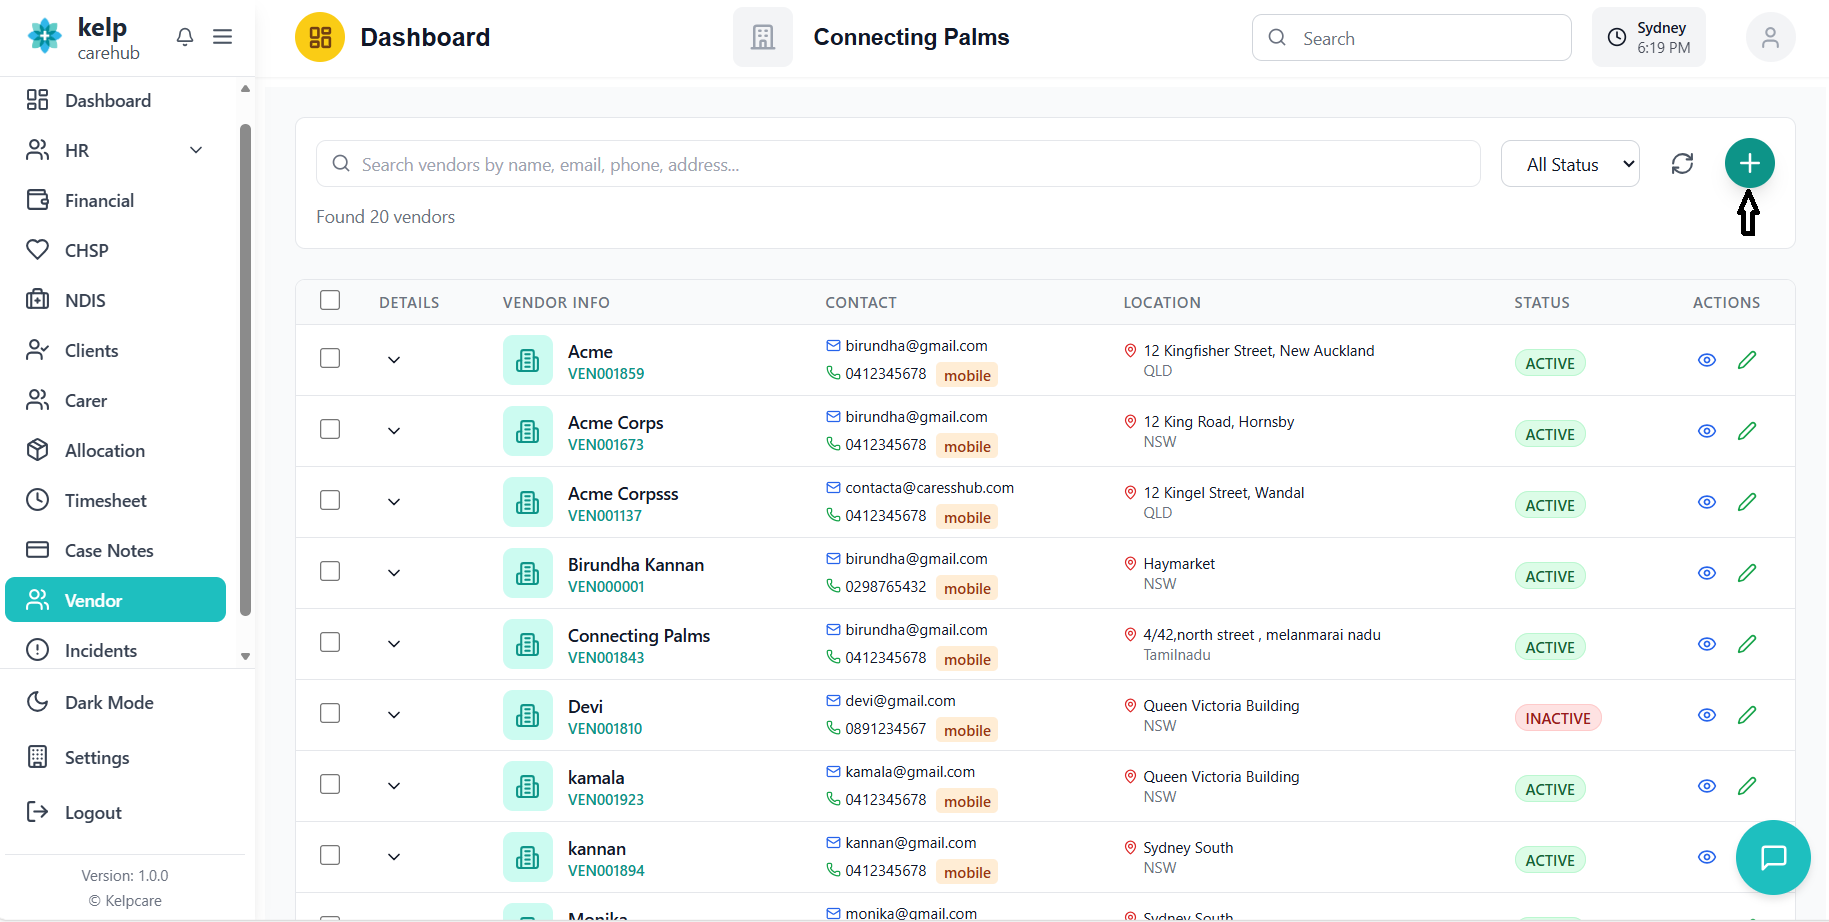
Vendor List View
Understanding the vendor list interface and table structure.
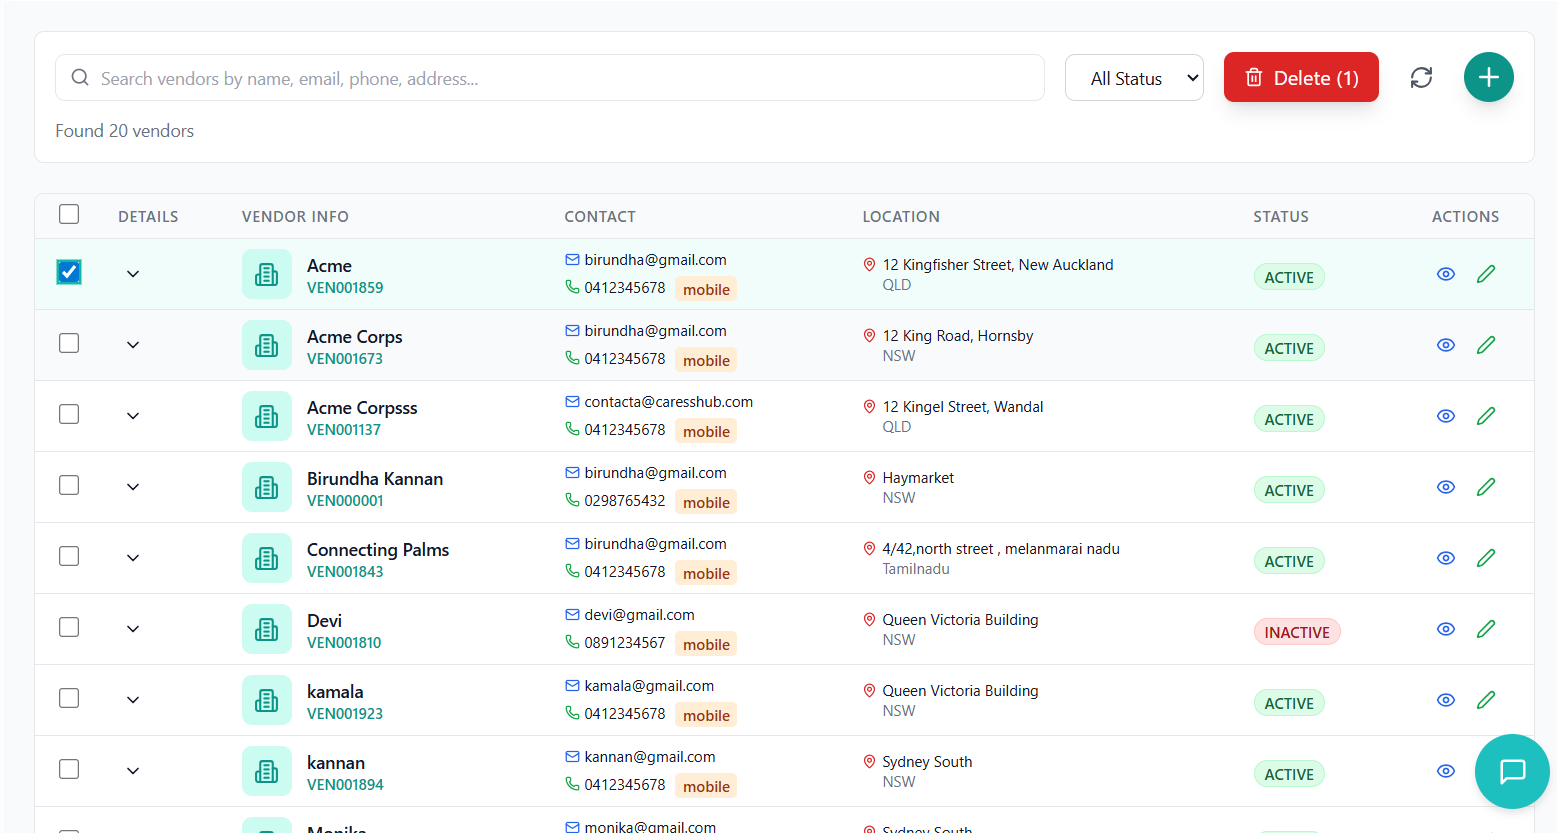
Understanding the Vendor Interface
- Title: "Vendor Management"
- Search Bar: Real-time search across all vendor fields
- Status Filter: Filter by Active/Inactive status
- Action Buttons: Refresh and Add Vendor buttons
- Total Vendors: Count of all vendors
- Active Vendors: Count of active vendors
- With Email: Vendors with email addresses
- With Phone: Vendors with phone numbers
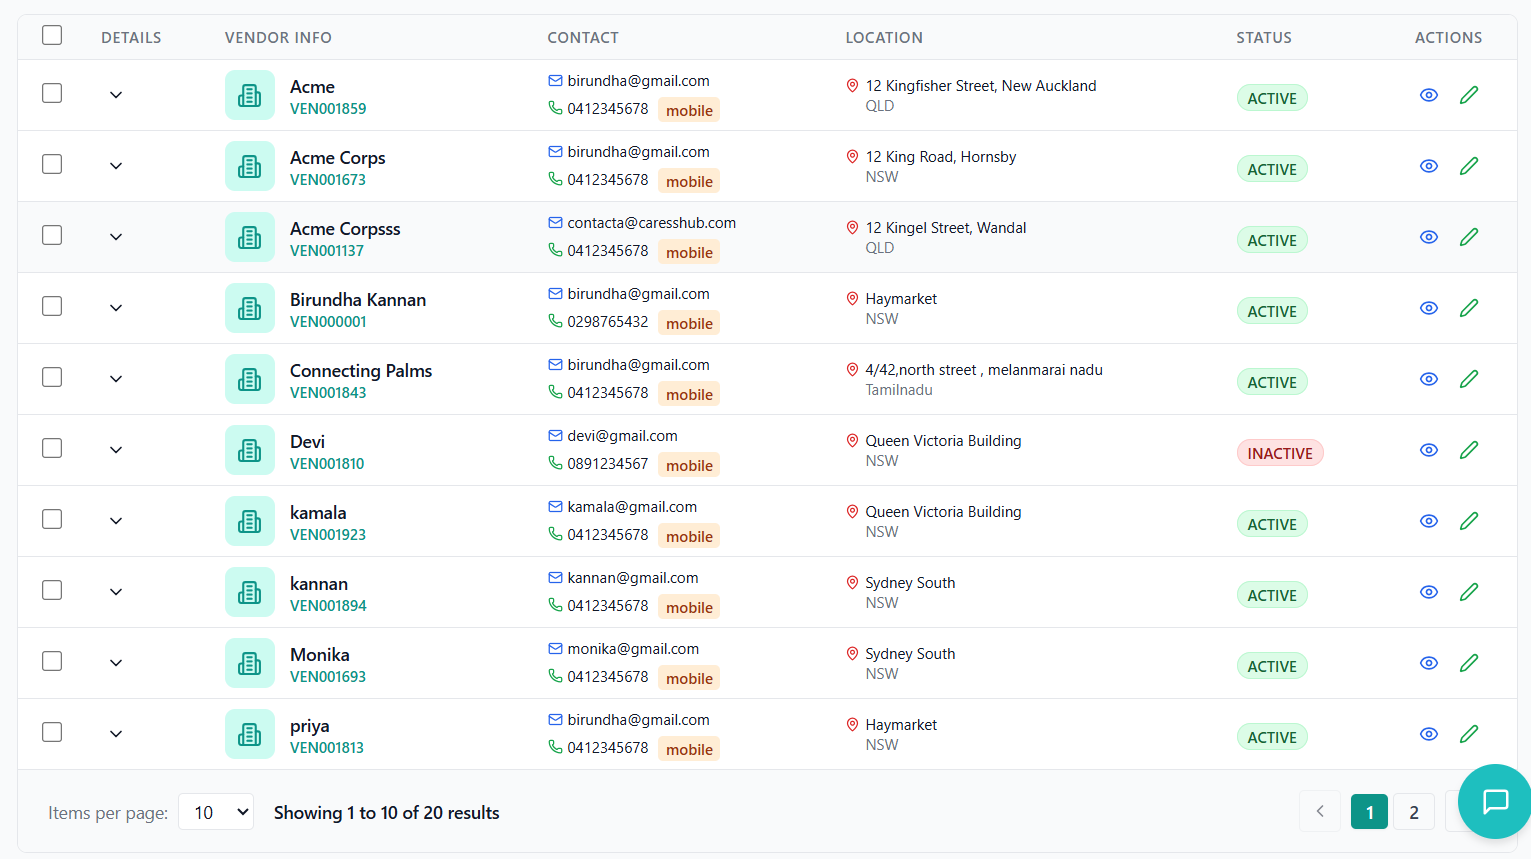
Vendor Table Columns
| Column | Description |
|---|---|
| Selection Checkbox | Select individual vendors for bulk operations |
| Expand/Collapse | Toggle to show/hide detailed vendor information |
| Vendor Info | Vendor name, number, and organization details |
| Contact | Email address and phone numbers with type badges |
| Location | Address information with map pin icon |
| Status | Active/Inactive status badge |
| Actions | View and Edit buttons for vendor operations |
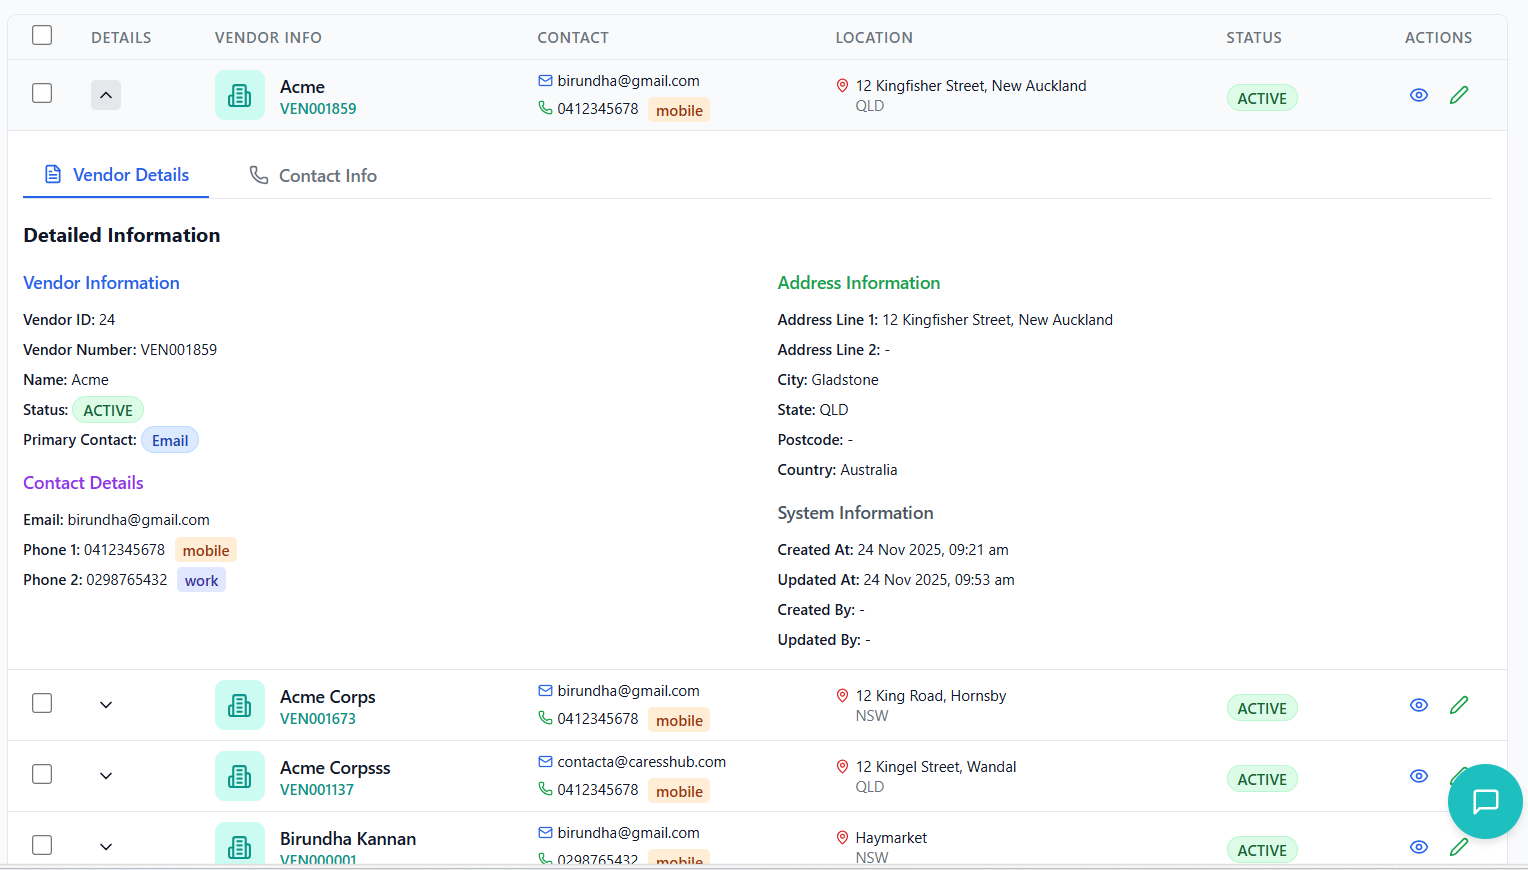
Expanded Row Details
- Details Tab: Comprehensive vendor information including system metadata
- Contact Tab: Complete contact information with communication preferences
- Quick Actions: Direct links to view and edit vendor details
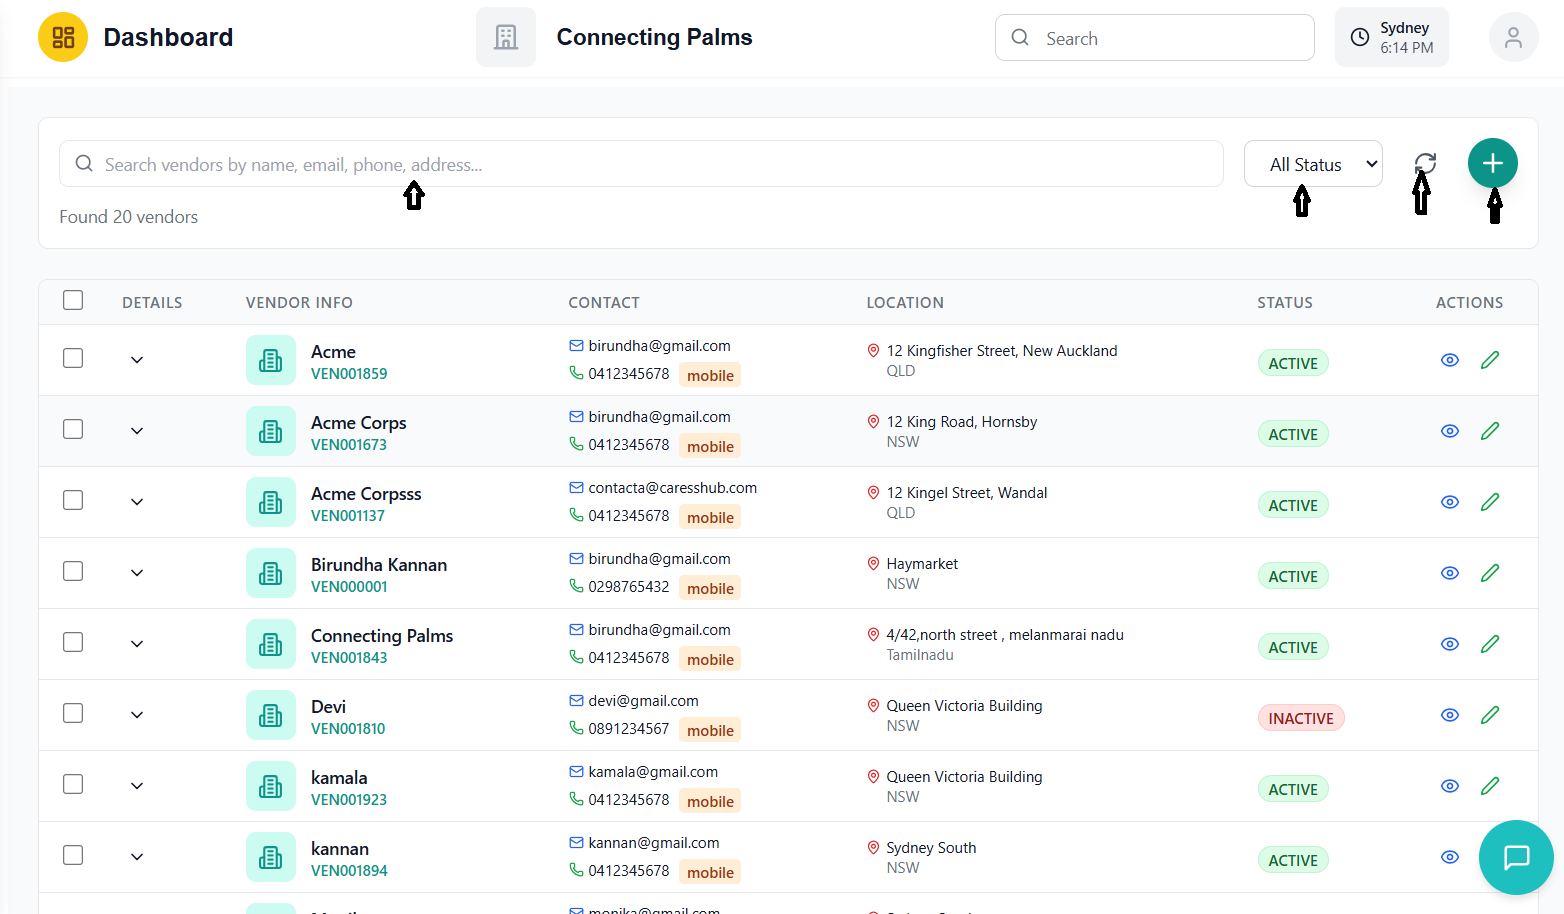
Search & Filter Vendors
How to search and filter vendor records effectively.
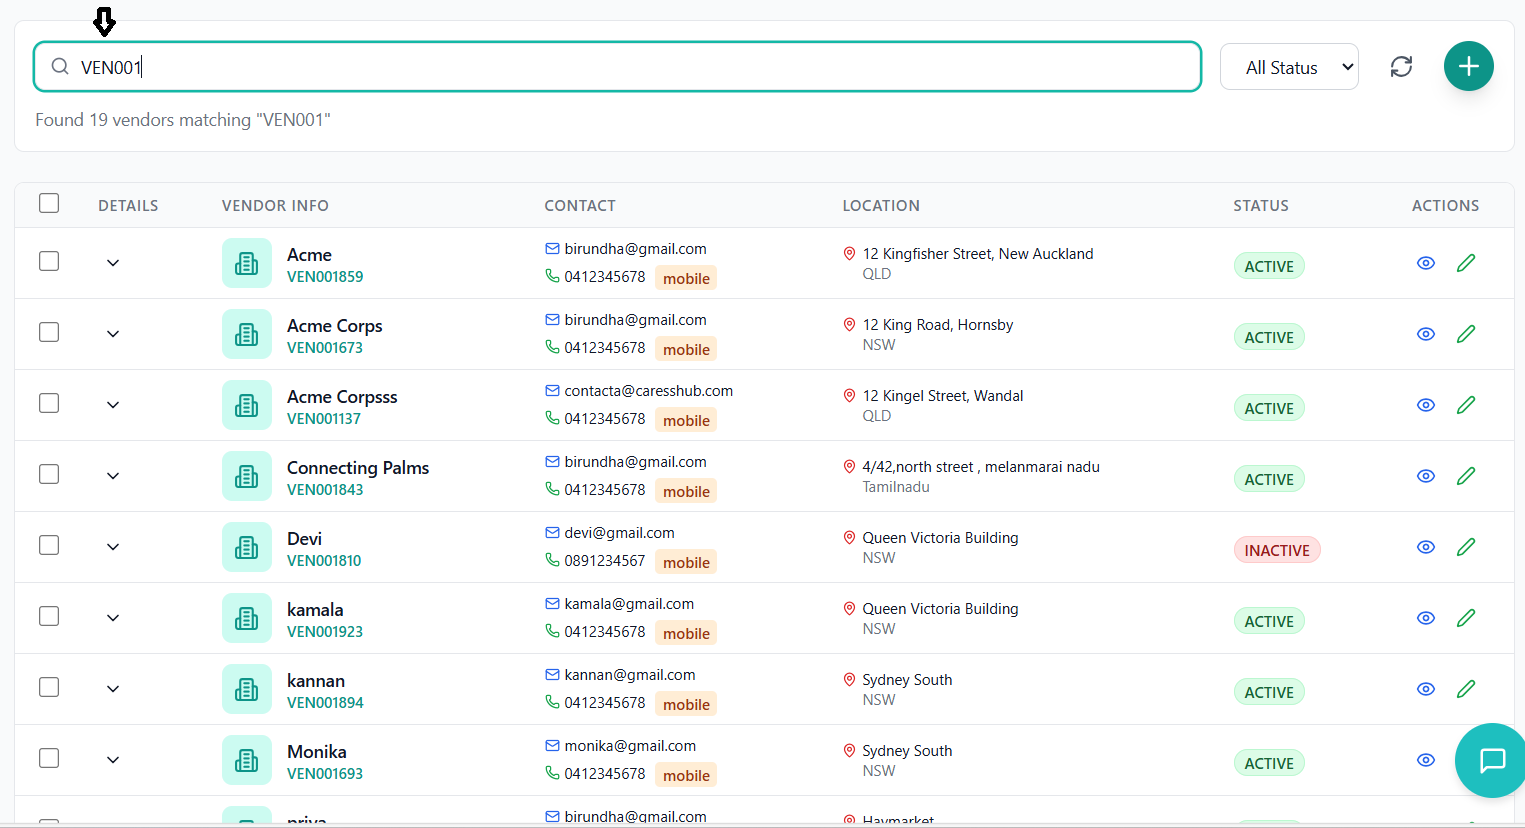
Search Functionality
- Located at the top of the vendor list
- Real-time search as you type
- Searches across multiple fields:
- Vendor name
- Email addresses
- Phone numbers
- Address information
- Vendor numbers
- Results update instantly
- Use partial matches for broader results
- Search by phone number without formatting (0412345678)
- Search by email domain (e.g., "@gmail.com")
- Combine search terms for more specific results
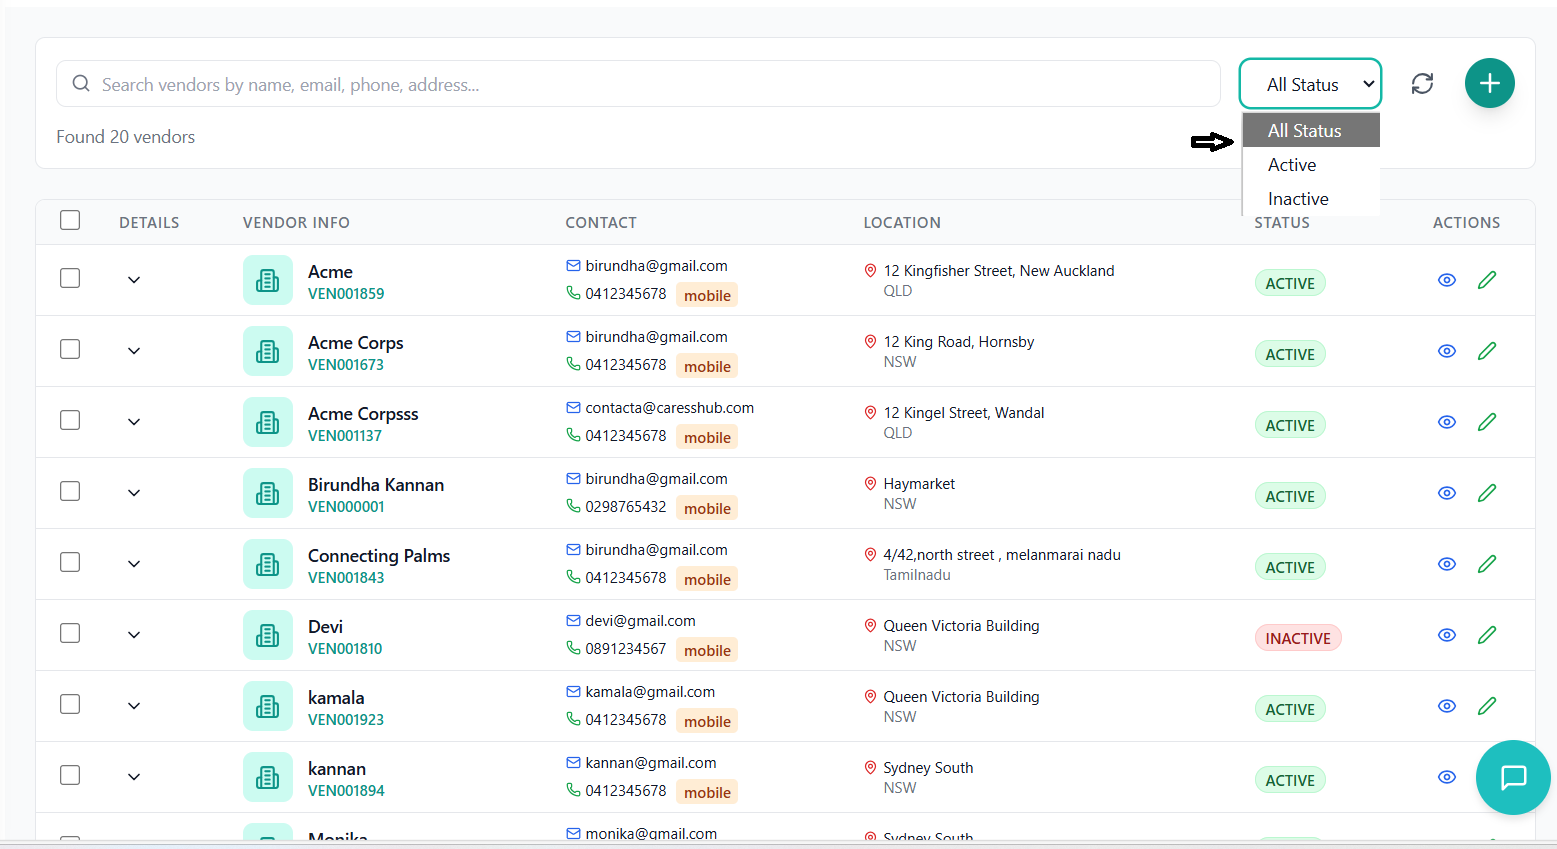
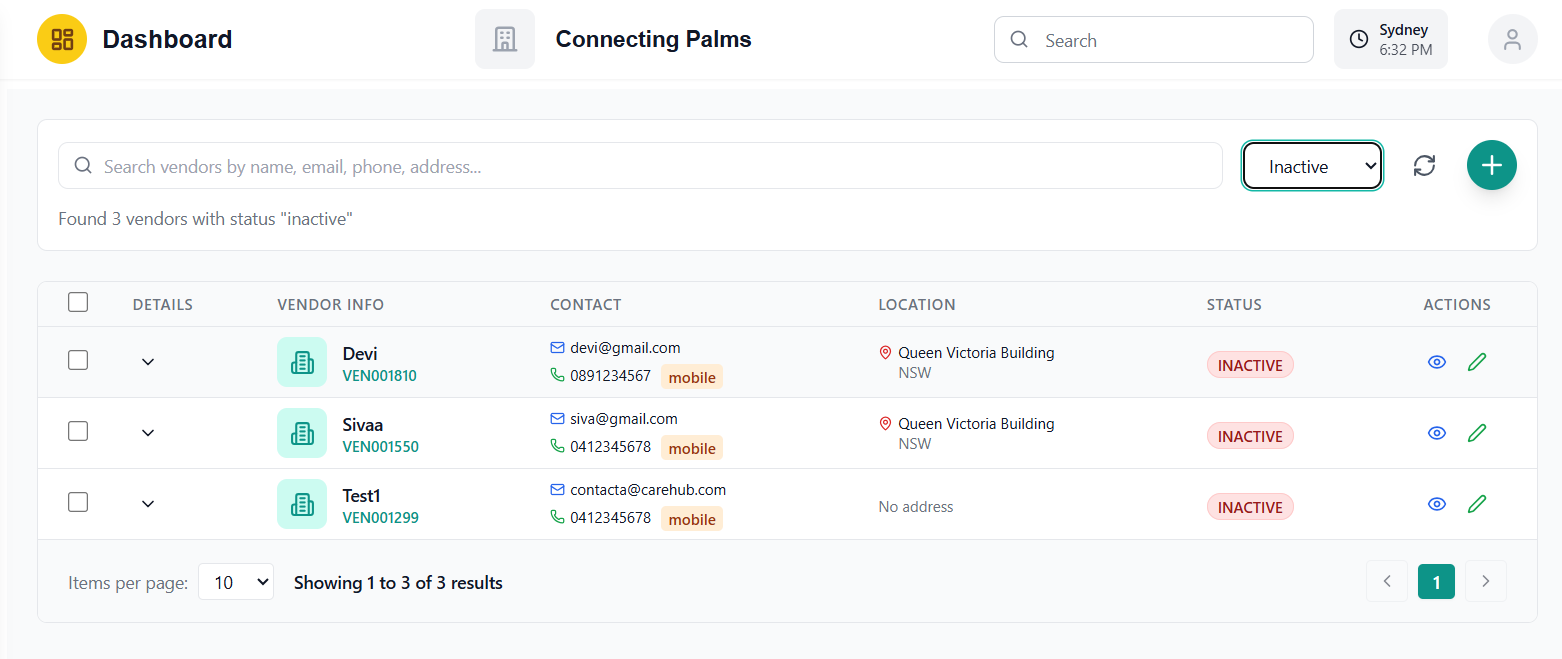
Filtering Options
- Dropdown filter for vendor status
- Options: All Status, Active, Inactive
- Applies immediately when selected
- Can be combined with search terms
- Shows total number of matching vendors
- Updates automatically with search/filter changes
- Displays applied filters in the count message
Advanced Search Techniques
- Use the search to find vendors by location (suburb, city)
- Search for vendors with specific contact methods
- Combine status filter with search for active/inactive vendors matching criteria
- Use the refresh button to clear all filters and search terms
Adding New Vendor
Process for creating new vendor records using the multi-step form.
Accessing the Add Vendor Form
- Click the "+" (Add Vendor) button in the header
- Side panel slides in from the right
- Multi-step form appears with three tabs
Step 1: Basic Information
- Enter the vendor's business name
- Required field (marked with *)
- Maximum 255 characters
- Select Active or Inactive status
- Default is "Active"
- Required field
- Enter primary email address
- Optional field
- Must be valid email format
- Maximum 255 characters

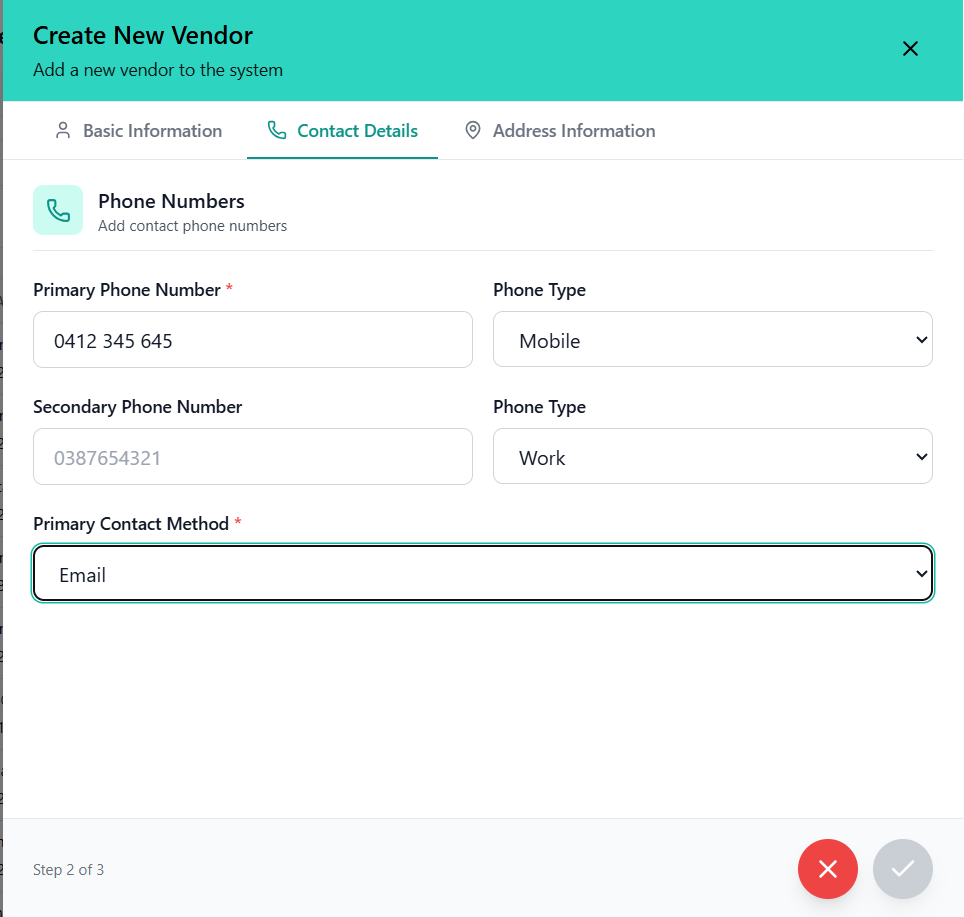
Step 2: Contact Details
- Enter primary contact number
- Required field
- Australian format validation (0412345678 or +61412345678)
- Maximum 20 characters
- Select phone type: Mobile, Work, or Home
- Default is "Mobile"
- Enter additional contact number
- Same validation as primary phone
- Select preferred contact method
- Options: Email, Phone 1, Phone 2
- Required field
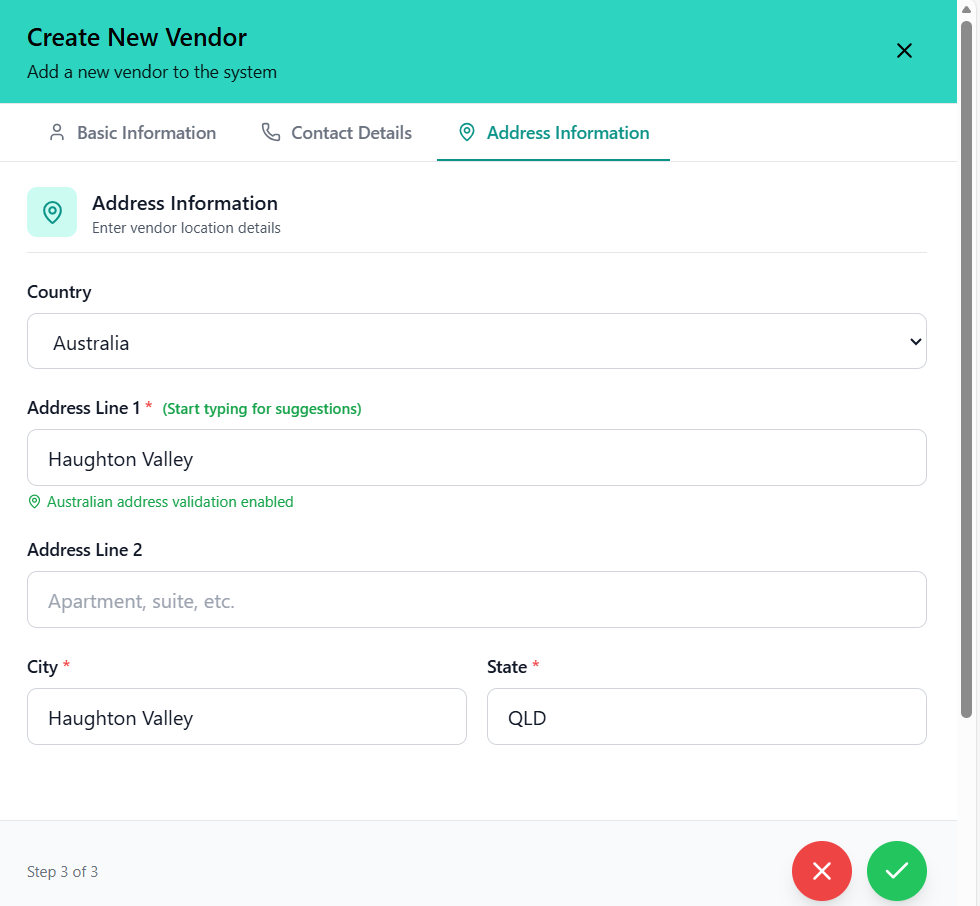
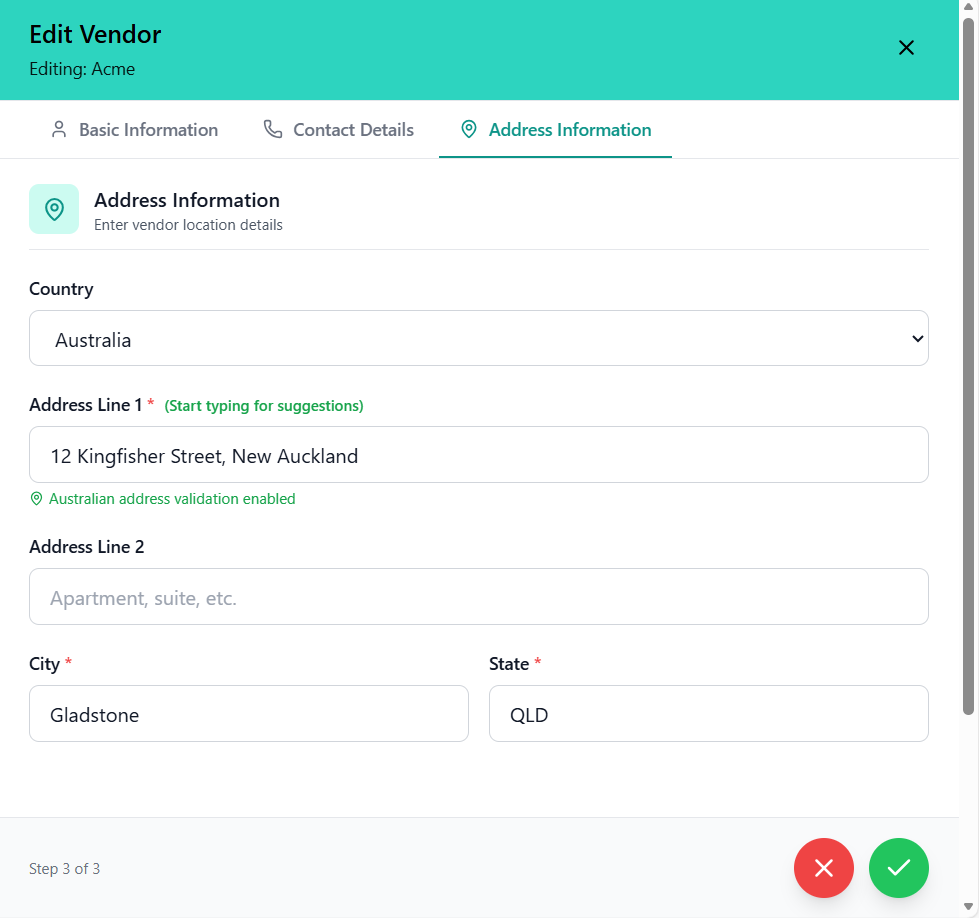
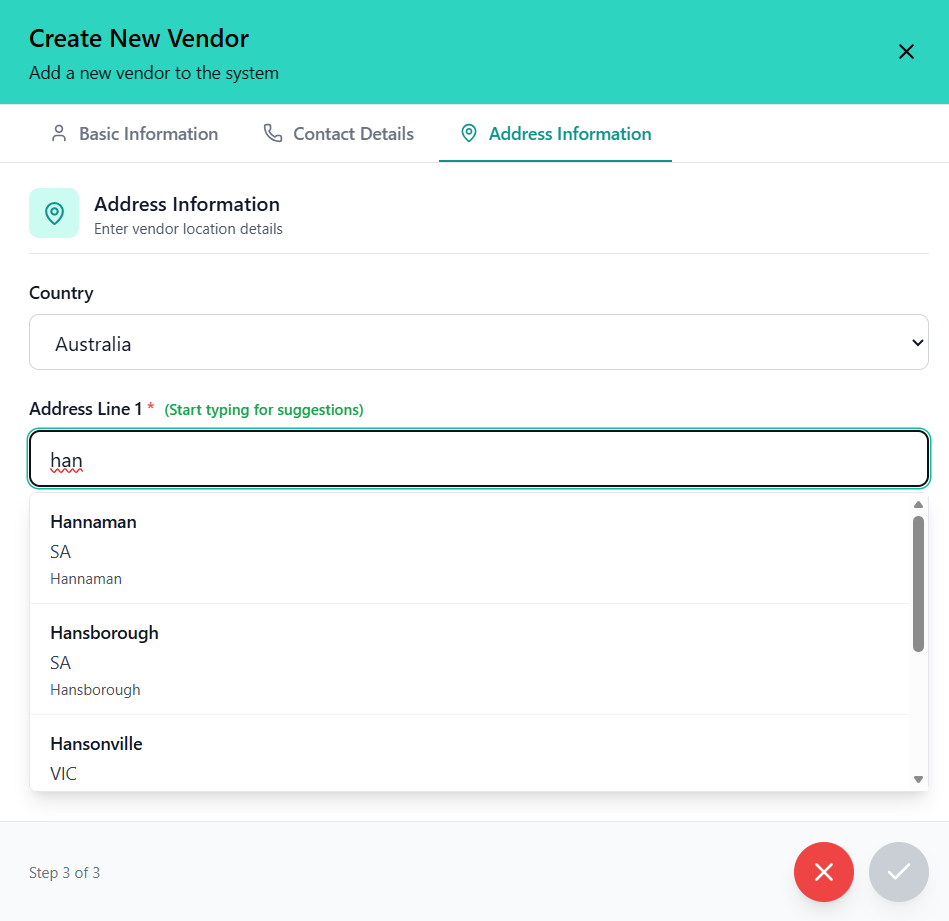
Step 3: Address Information
- Select country from dropdown
- Options include Australia, India, US, UK, Canada
- Default is empty (user must select)
- Enter street address
- Required field
- Address autocomplete available for Australian addresses
- Maximum 255 characters
- Enter apartment, suite, or additional address info
- Maximum 255 characters
- Enter city and state/province
- Both are required fields
- Maximum 100 characters each
Form Validation & Submission
- All required fields must be completed before submission
- Phone numbers must be valid Australian format
- Email must be valid format if provided
- Address fields have character limits
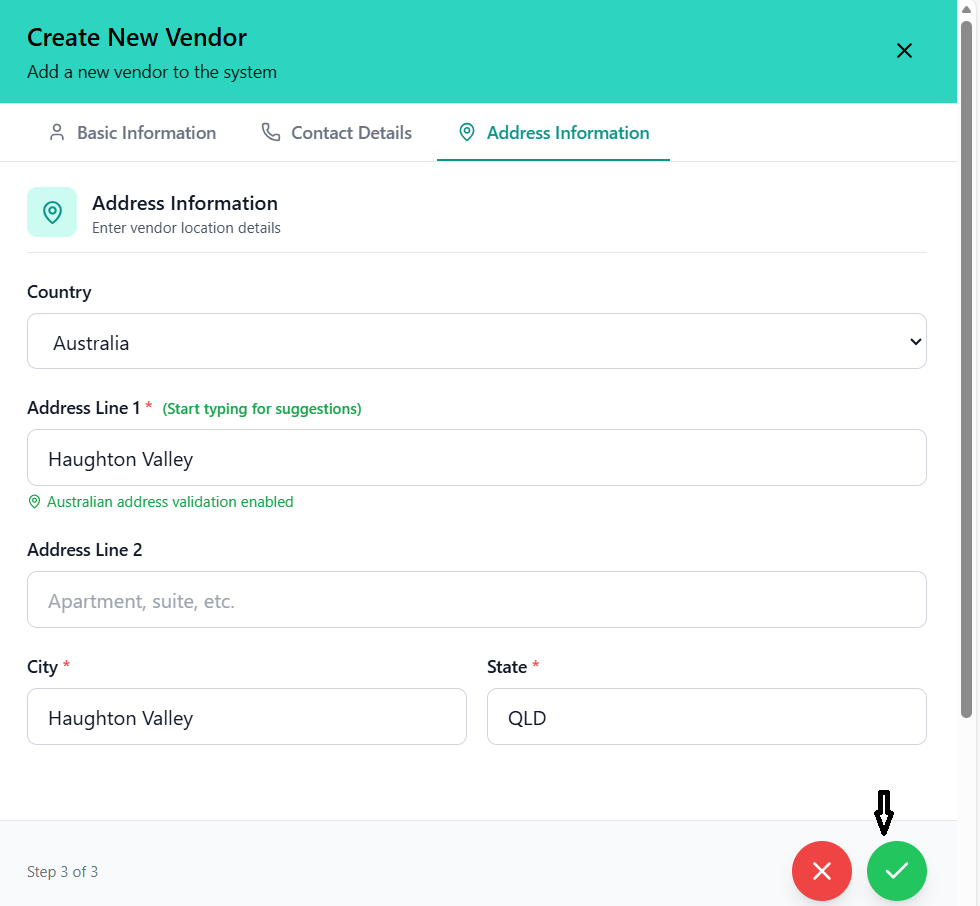
- Review all entered information
- Click the green checkmark button to submit
- System validates all fields
- Success message appears upon completion
- Form closes automatically
Editing Vendor Details
How to modify existing vendor information.
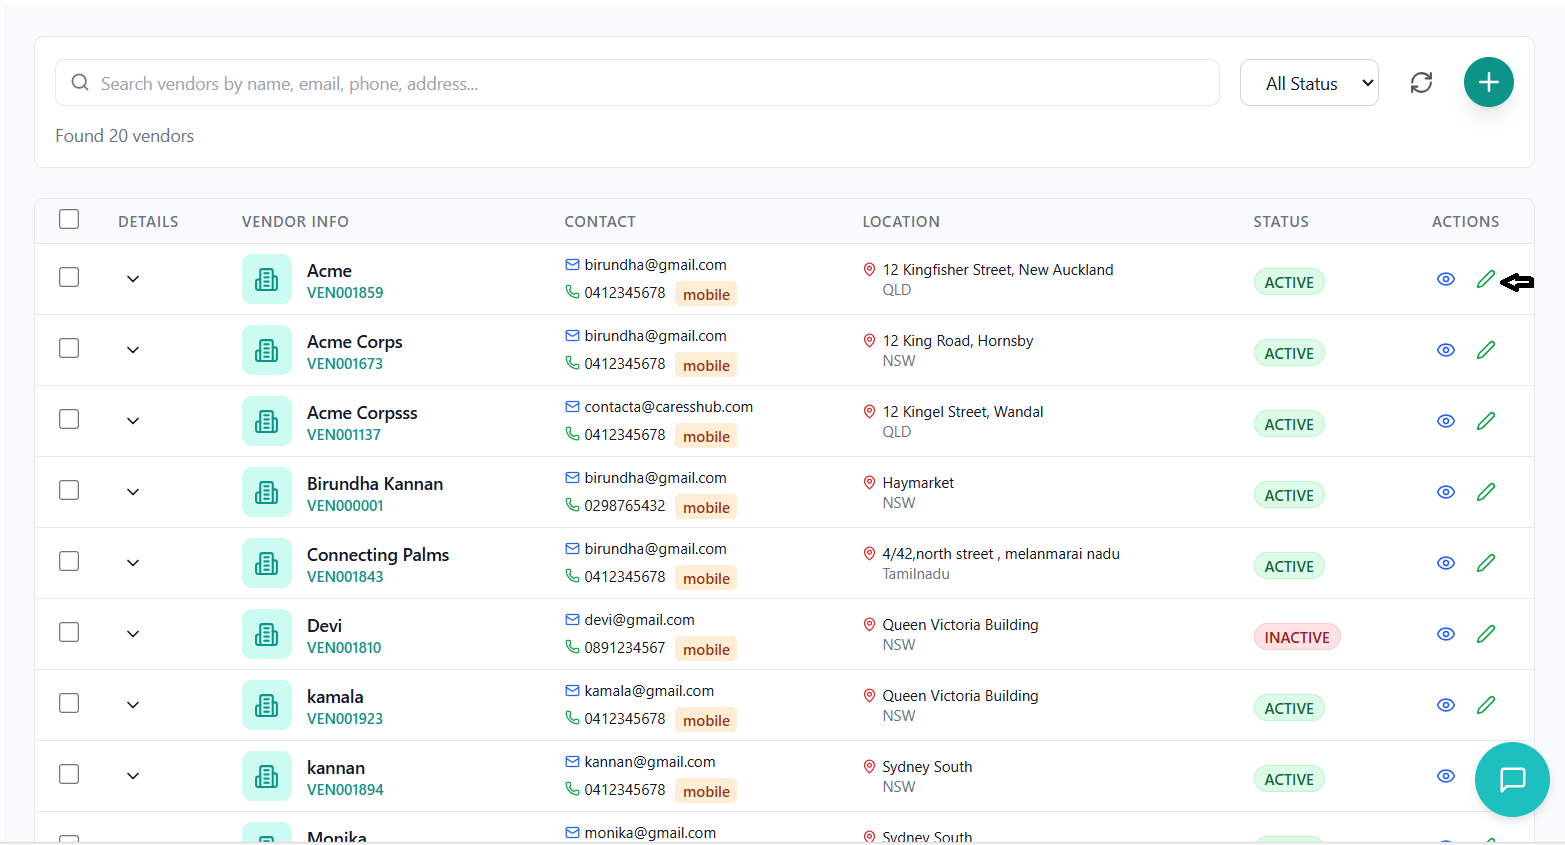
Accessing Edit Mode
- Find the vendor you want to edit in the list
- Click the green "Edit" button in the Actions column
- Edit form opens in side panel with pre-filled data
Edit Form Features
- All existing vendor data is automatically populated
- Form maintains the same three-step structure
- Current values are displayed in all fields
- Navigate through steps using tabs
- Modify any field as needed
- All validation rules apply during editing
- Address autocomplete works the same as in add mode
Saving Changes
- Double-check all modified fields
- Ensure phone numbers and emails are valid
- Verify address information is correct
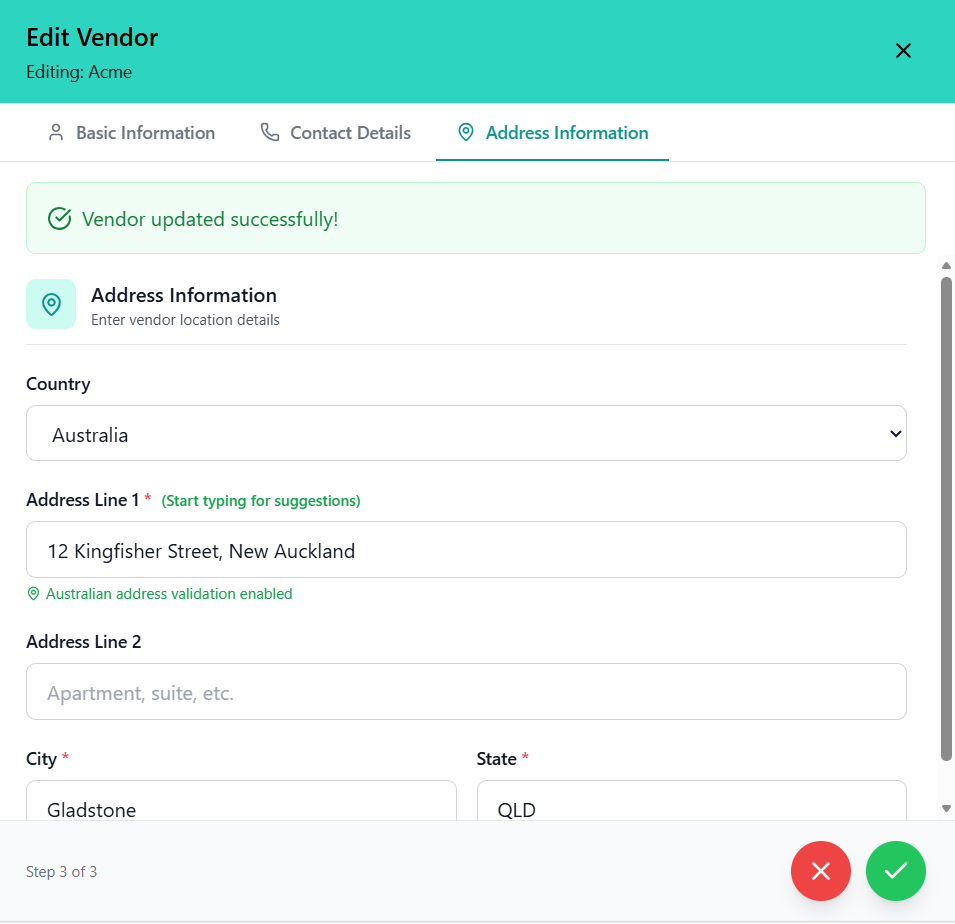
- Click the green checkmark button to save
- System validates all fields
- Success message appears: "Vendor updated successfully!"
- Form closes automatically
- Vendor list refreshes with updated data
Canceling Edits
- Click the "X" button in the top right to close without saving
- Navigate away from the form
- No changes are saved if canceled
Viewing Vendor Details
Detailed view of vendor information and documents in a dedicated page.
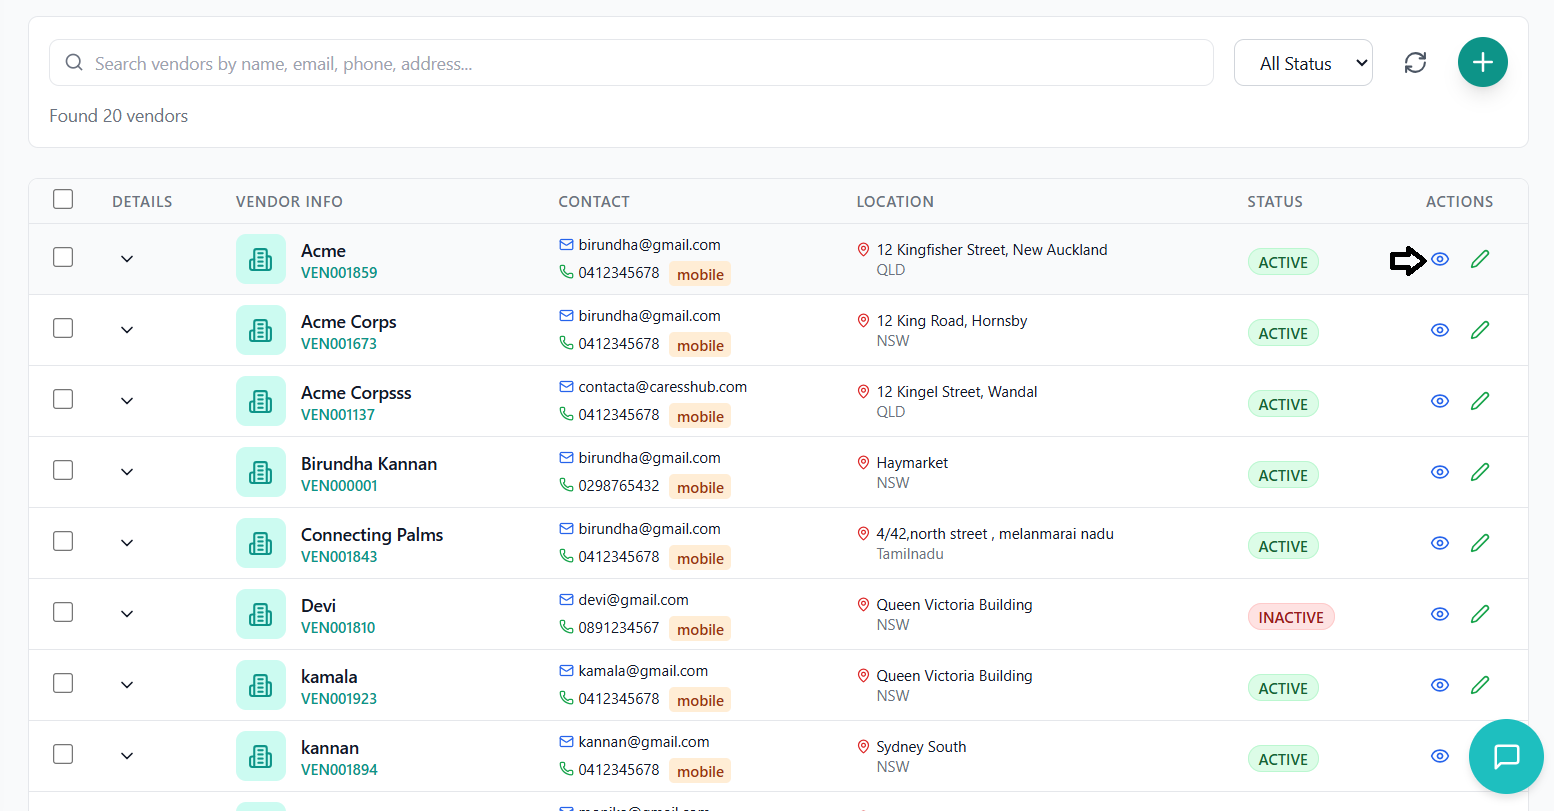
Accessing Vendor Details
- Locate the vendor in the list view
- Click the blue "View" button in the Actions column
- System navigates to the dedicated vendor details page
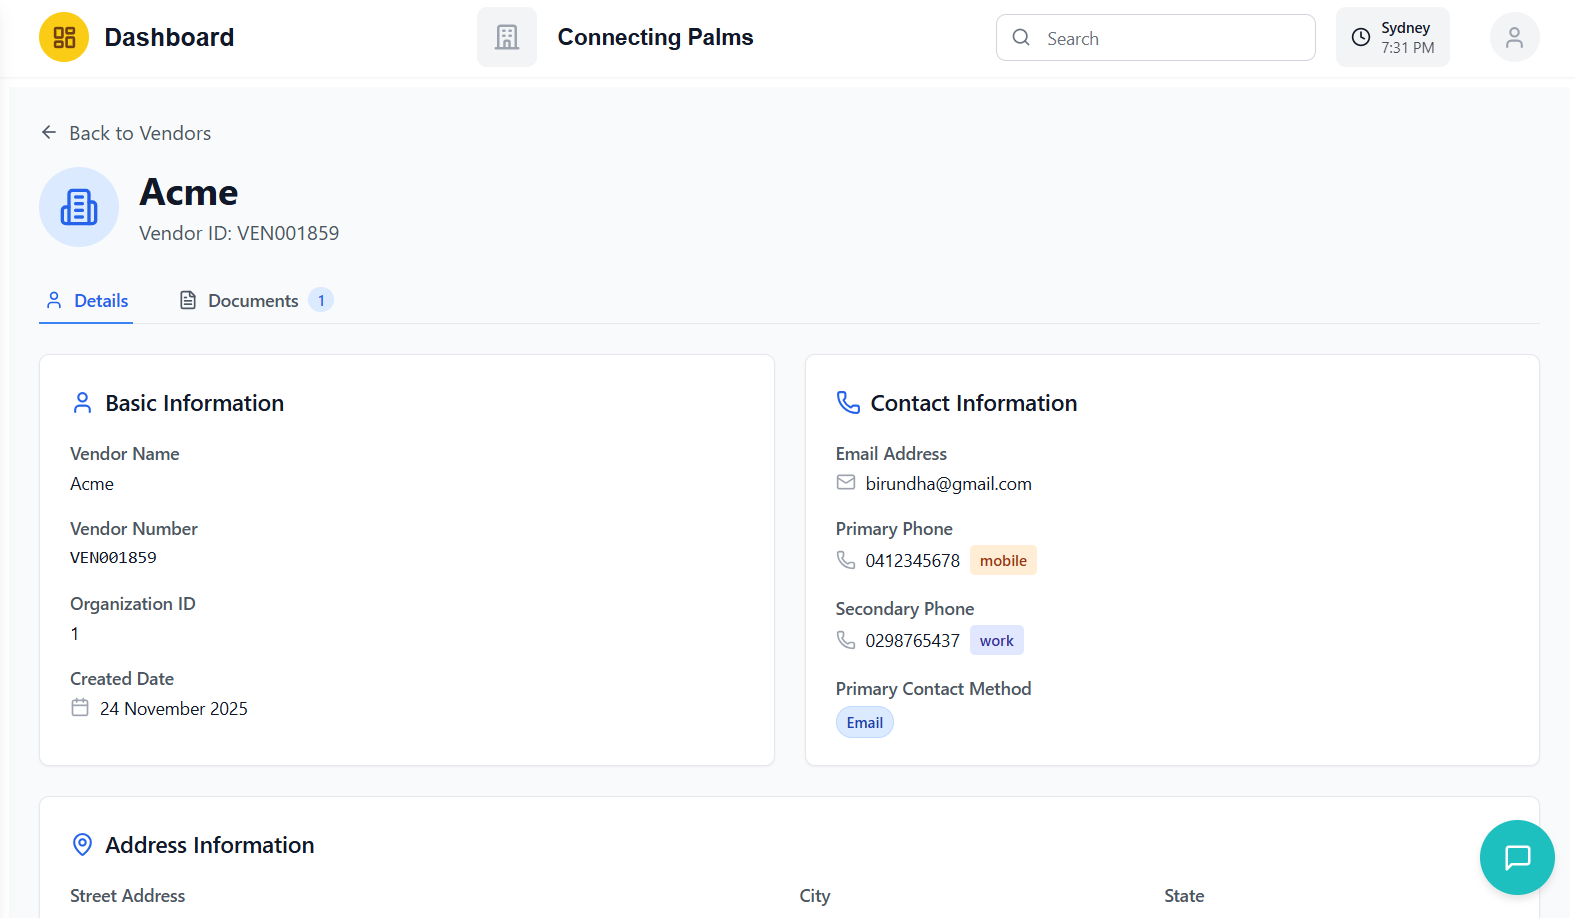
Vendor Details Page Layout
- Back Button: Returns to vendor list
- Vendor Name: Large display of vendor name
- Vendor ID: Unique identifier below name
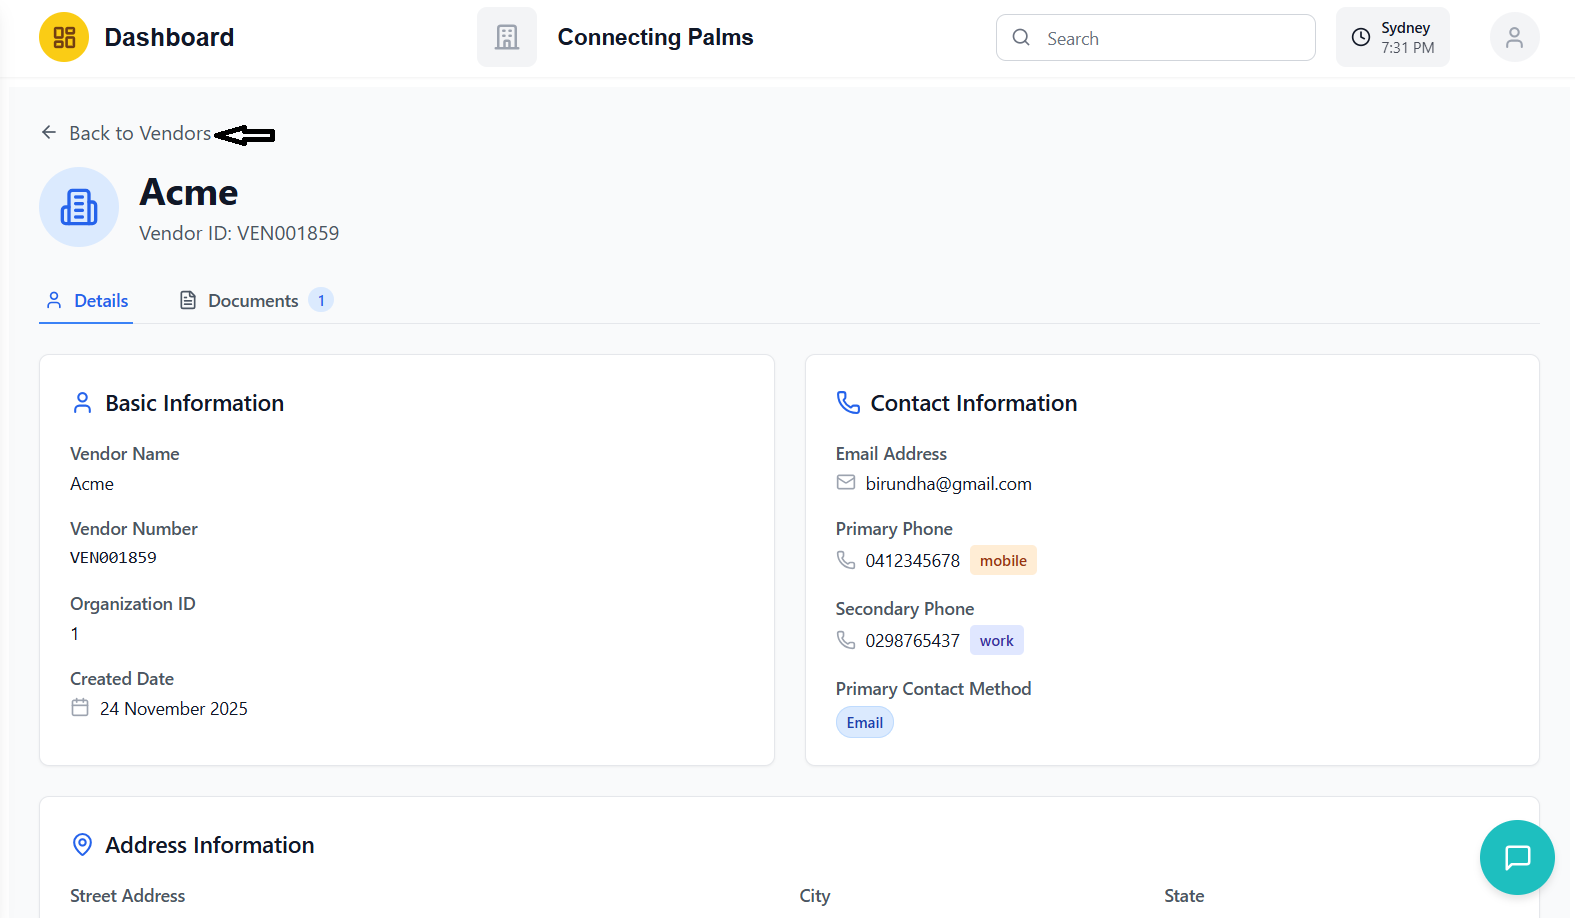
- Details Tab: Comprehensive vendor information
- Documents Tab: Document management interface
- Active tab is highlighted with blue indicator
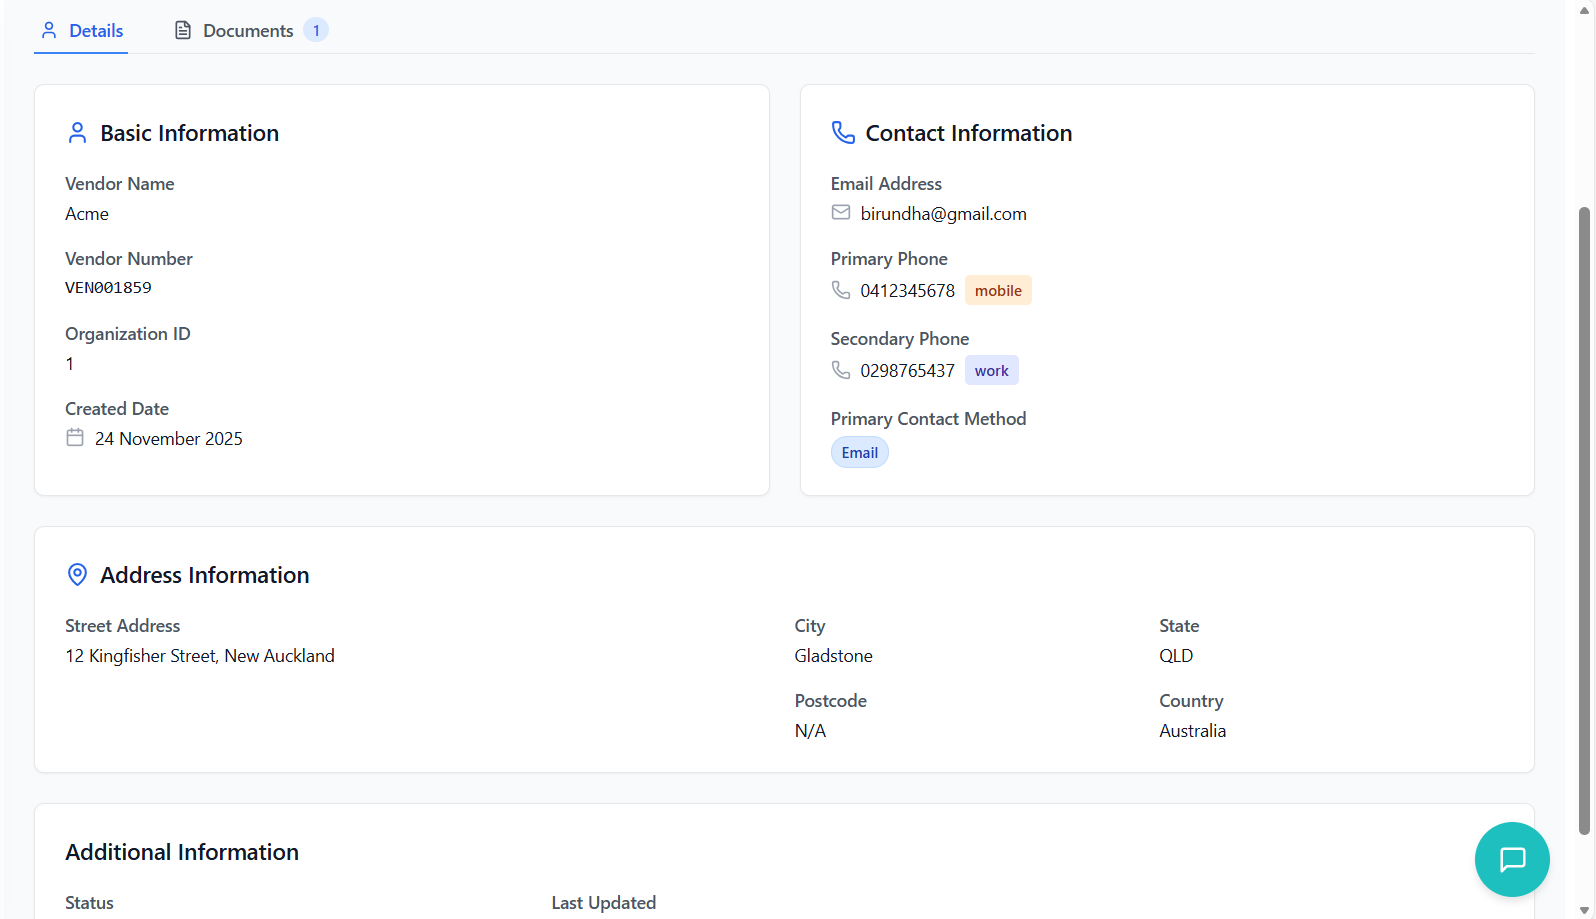
Details Tab Content
- Vendor name and number
- Organization ID
- Creation date with calendar icon
- Email address with mail icon
- Phone numbers with type badges
- Primary contact method badge
- Complete address in grid layout
- Street address, city, state, postcode, country
- Map pin icon for visual reference
- Vendor status
- Last updated timestamp
- System metadata
Returning to Vendor List
- Click the "Back to Vendors" button at the top of the page
- Returns to the vendor list with previous filters intact
- No data is lost when navigating back
Document Management
Uploading, viewing, and managing vendor documents with preview capabilities.
Accessing Document Management
- Open vendor details page
- Click on the "Documents" tab
- Document management interface loads
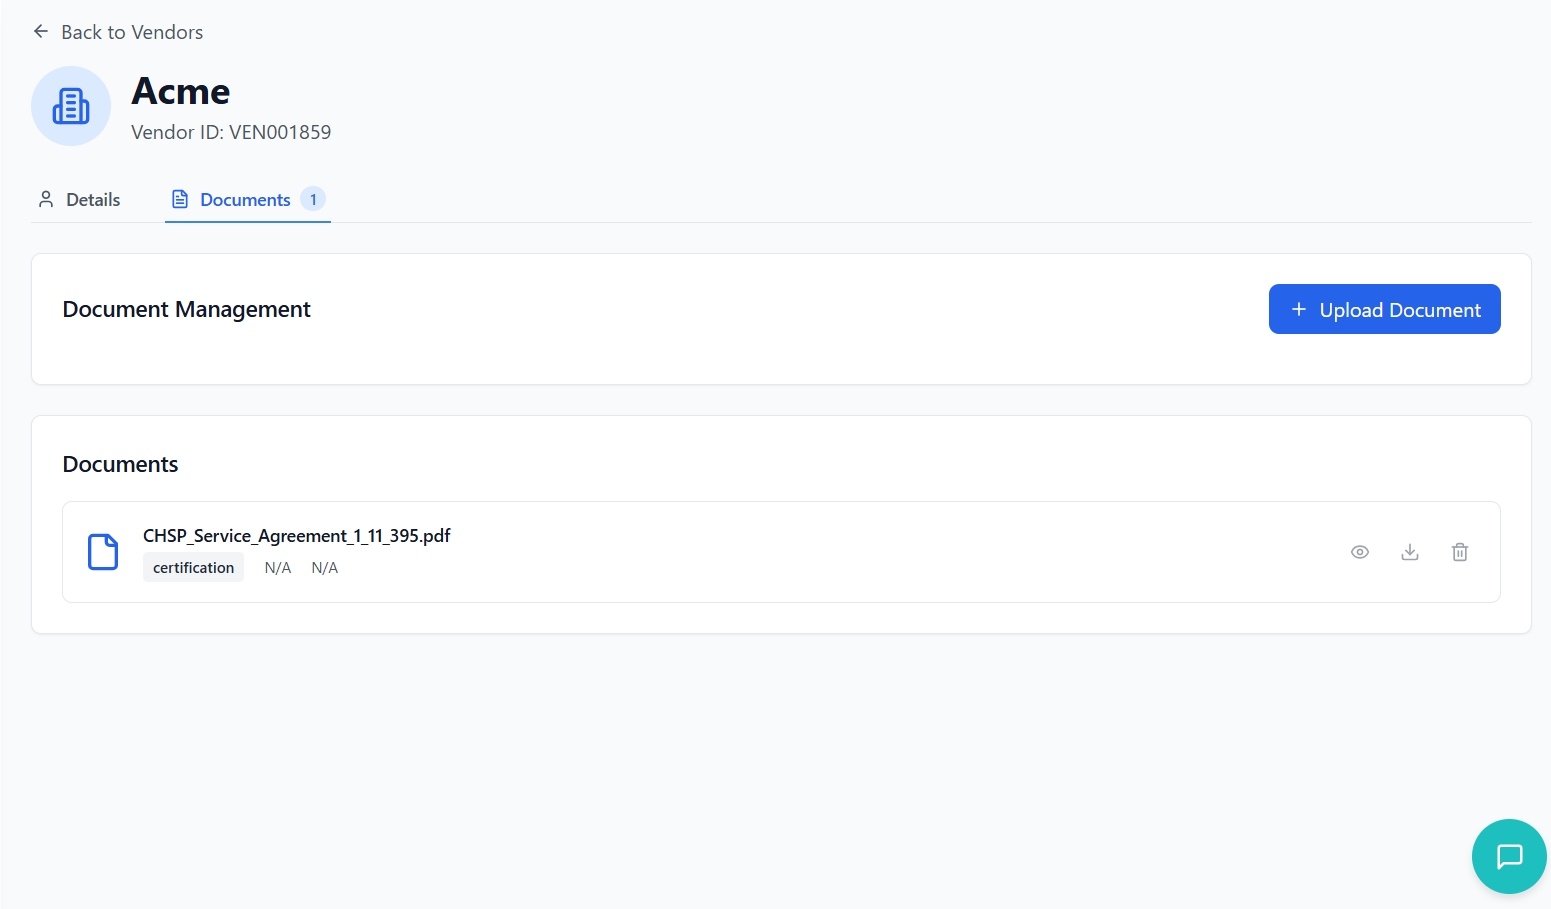
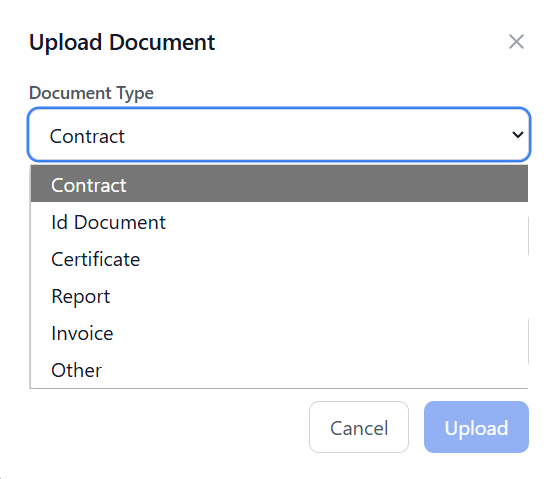
Uploading Documents
- Click "Upload Document" button
- Modal window appears with upload form

- Choose from predefined document types:
- Contract
- ID Document
- Certificate
- Report
- Invoice
- Other
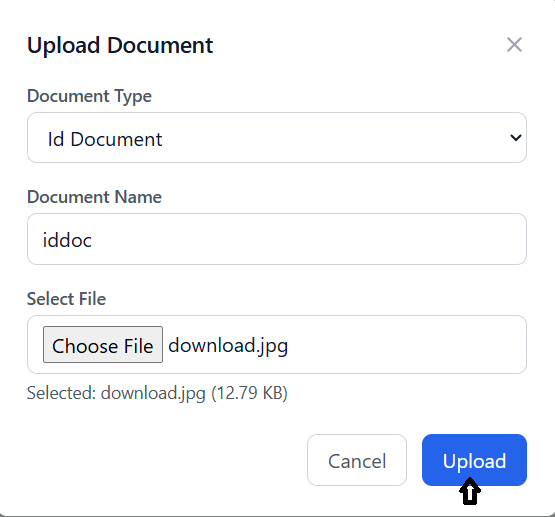
- Provide descriptive name for the document
- Auto-filled from filename but can be modified
- Click "Choose File" or drag and drop
- Supported formats: PDF, DOC, DOCX, JPG, JPEG, PNG, XLS, XLSX
- File size and name displayed after selection
- Click "Upload" button
- Progress bar shows upload status
- Success message appears when complete
- Document appears in the documents list
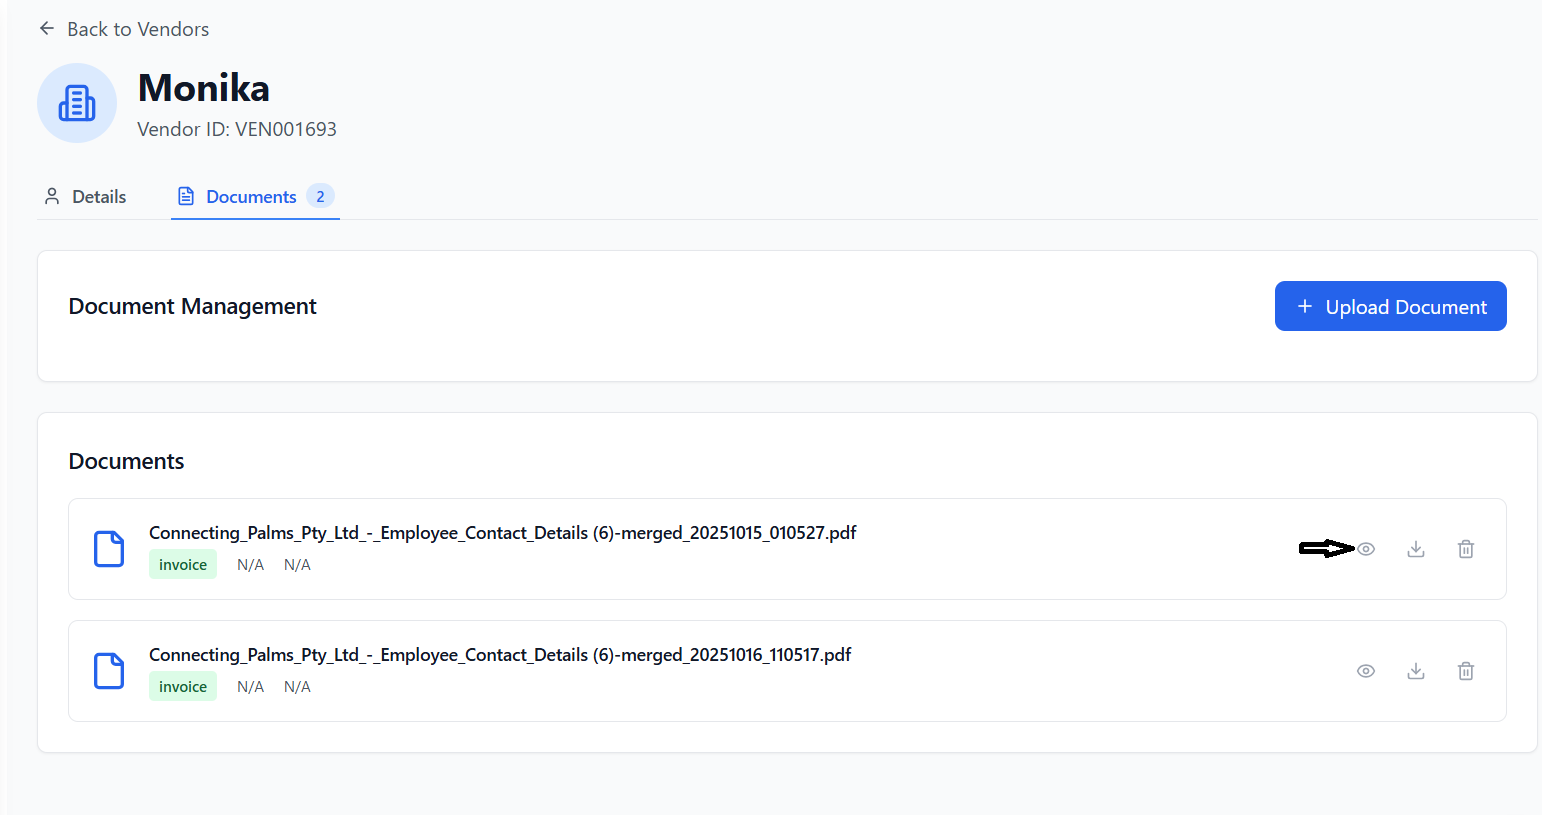
Viewing Documents
- All uploaded documents displayed in list format
- Each document shows:
- Document name
- Type badge
- File size
- Upload date
- Action buttons
- Click the "View" (eye) button
- Document opens in preview modal
- PDFs display in embedded viewer
- Images show full-size preview
- Other file types show download option
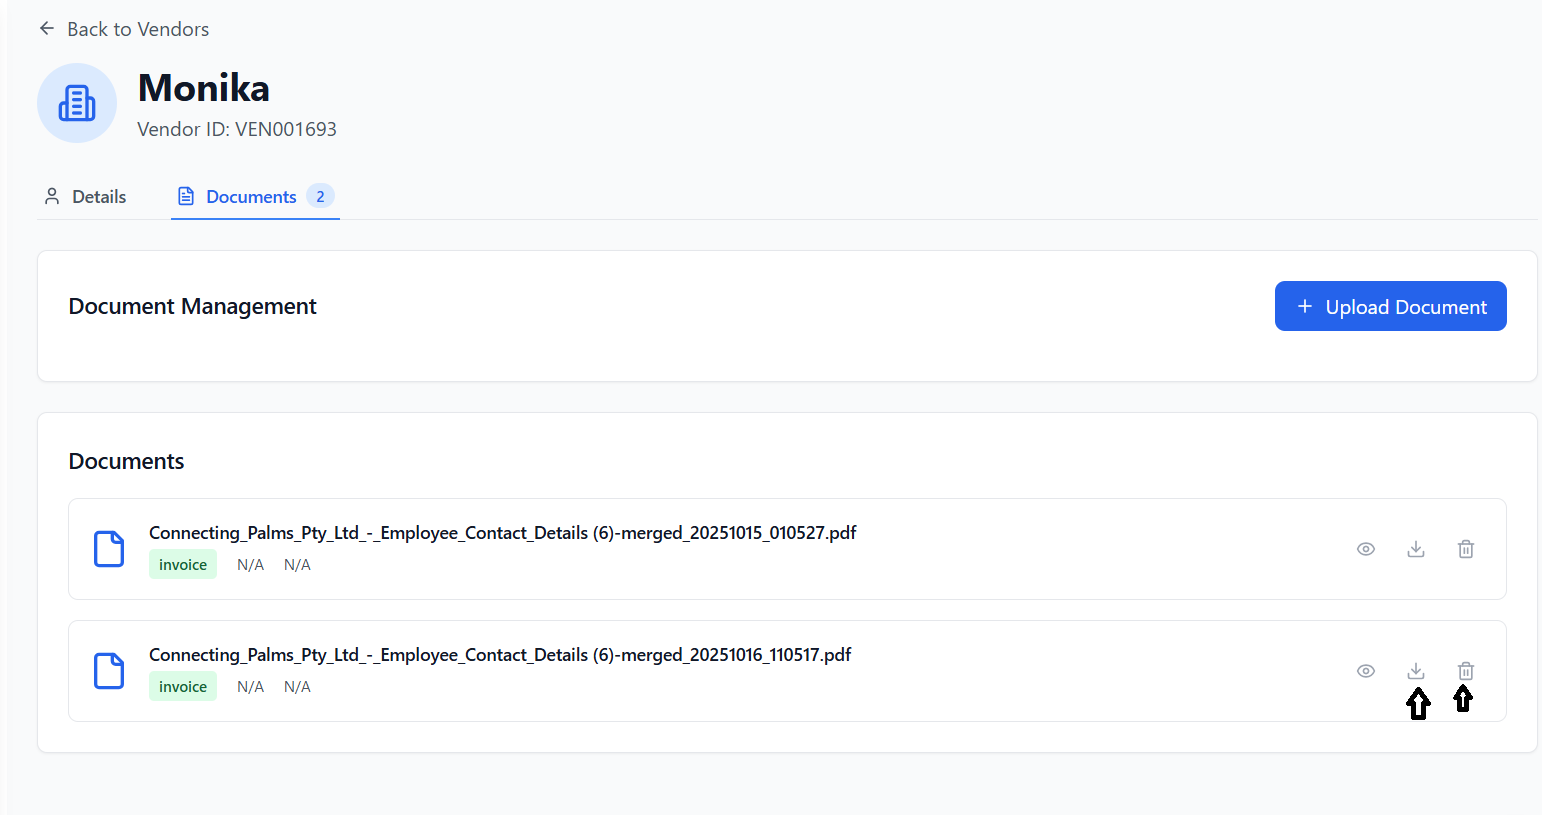
Managing Documents
- Click the "Download" button
- File downloads to your device
- Original filename is preserved
- Click the "Delete" (trash) button
- Confirmation dialog appears
- Document is permanently removed
- Action cannot be undone
Bulk Operations
Selecting and performing actions on multiple vendors simultaneously.
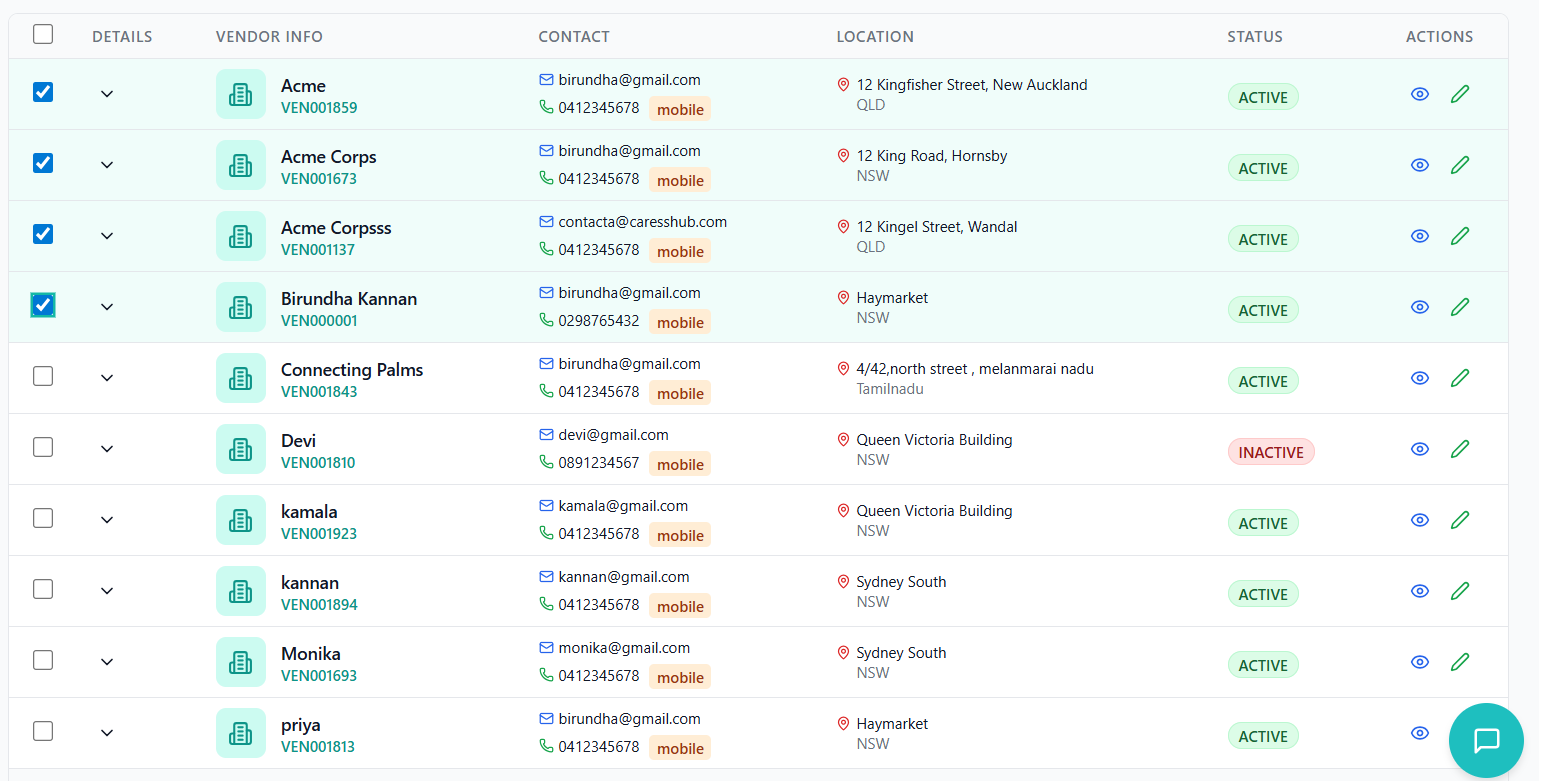
Selecting Vendors
- Check the checkbox in the first column for each vendor
- Selected vendors are highlighted
- Selection count appears in the bulk delete button
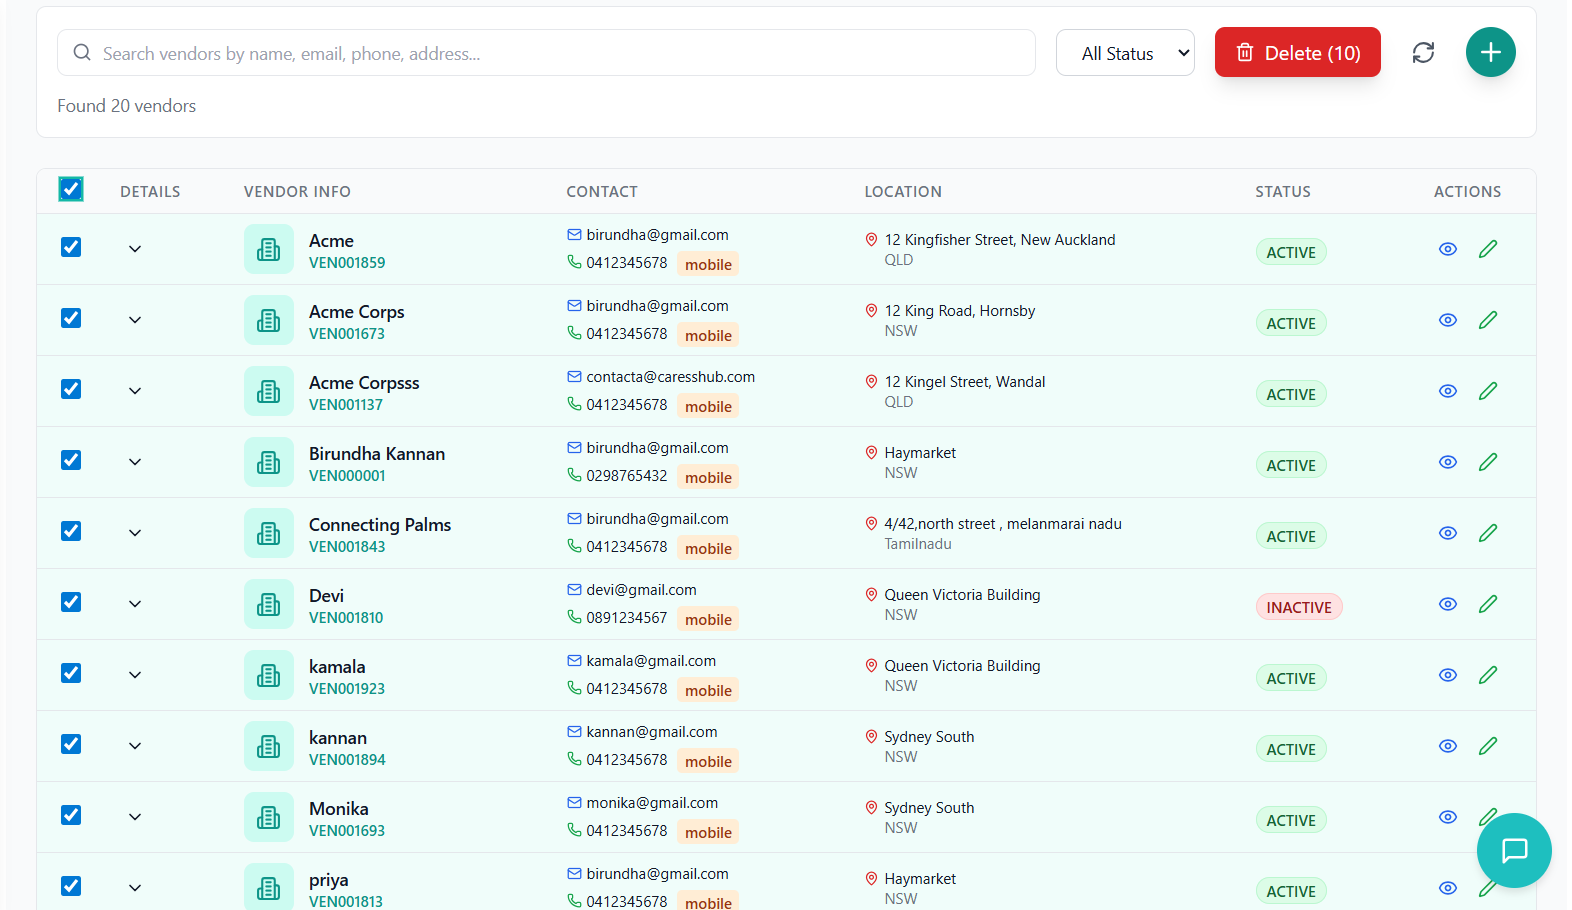
- Check the header checkbox to select all visible vendors
- Only selects vendors on the current page
- Uncheck to deselect all
Bulk Delete Operation
- Select one or more vendors
- Red "Delete (X)" button appears (X = number selected)
- Click the delete button
- System shows confirmation dialog
- Displays number of vendors to be deleted
- Requires explicit confirmation to proceed
- Click "OK" to confirm deletion
- Selected vendors are removed from the system
- Success message appears
- Vendor list refreshes automatically
Selection Management
- Selections are maintained when changing pages
- Filtering and searching updates the selection pool
- Refresh clears all selections
- Selected count is displayed in the delete button
Address Validation
Using Radar.io integration for address validation and autocomplete functionality.
How Address Validation Works
- System integrates with Radar.io geocoding API
- Provides real-time address suggestions
- Validates Australian addresses specifically
- Auto-fills city, state, and postcode fields
- API key loaded from environment variables
- Fallback to process.env if import.meta not available
- Base URL: https://api.radar.io/v1
- Country restriction: Australia (AU)
- Limit: 5 suggestions maximum
Using Address Autocomplete
- Start typing in Address Line 1 field
- Suggestions appear after 3+ characters
- Dropdown shows matching addresses
- Loading indicator appears during search
- Street address with number
- Suburb/locality information
- City and state
- Postcode
- Full formatted address display
- Click on a suggestion from the dropdown
- Address Line 1 auto-filled with street address
- City, state, and postcode fields auto-populated
- Country set to Australia automatically
- Dropdown closes after selection
Error Handling
- If API key not configured, message displays
- System continues to work without validation
- Manual address entry still possible
- Error message shows if API call fails
- User can continue with manual entry
- System gracefully degrades functionality
Address Data Transformation
- Raw Radar.io response transformed to standardized format
- Australian state names converted to abbreviations (NSW, VIC, QLD, etc.)
- Street address extracted from multiple possible fields
- Suburb and city information properly separated
- Postcode formatted consistently
Troubleshooting Guide
Solutions to common issues and problems you may encounter.
Common Issues
Possible Causes:
- Required fields not completed
- Invalid phone number format
- Network connection issues
- Server errors
Solutions:
- Check all required fields (marked with *) are filled
- Ensure phone numbers are in Australian format (0412345678)
- Verify internet connection
- Check browser console for error messages
Possible Causes:
- Radar.io API key not configured
- Network connectivity issues
- Address too specific or uncommon
Solutions:
- Check API configuration in environment variables
- Try different address search terms
- Enter address manually if autocomplete fails
- Check browser network tab for API call errors
Possible Causes:
- File too large
- Unsupported file format
- Network issues
- Server storage limits
Solutions:
- Check file size (system may have limits)
- Ensure file format is supported (PDF, DOC, JPG, etc.)
- Try smaller files if upload consistently fails
- Check server logs for specific error messages
Possible Causes:
- Network connection issues
- Organization ID not set
- API endpoint problems
- Authentication issues
Solutions:
- Check internet connection
- Verify organization ID is properly set
- Refresh the page (F5)
- Check browser console for API errors
- Contact IT support if issue persists
Possible Causes:
- Browser PDF viewer issues
- Corrupted document file
- Unsupported file type for preview
- Network issues loading document
Solutions:
- Try downloading the document instead of previewing
- Check if browser has PDF plugin enabled
- Try different browser (Chrome, Firefox, Edge)
- Re-upload the document if corrupted
Error Message Reference
| Error Message | Meaning | Solution |
|---|---|---|
| "Please enter a valid Australian phone number" | Phone number format invalid | Use format 0412345678 or +61412345678 |
| "Address validation unavailable" | Radar.io API not configured | Enter address manually or check API config |
| "Failed to upload document" | Document upload failed | Check file size, format, and try again |
| "Network error" | Connection issues | Check internet connection and retry |
| "Vendor not found" | Vendor ID invalid or deleted | Refresh list and verify vendor exists |
Performance Optimization
- Use pagination for large vendor lists
- Apply filters to reduce data load
- Close modals when not in use
- Clear document previews when navigating away
- Use search instead of scrolling through long lists
Contact Support
- Persistent errors after trying solutions
- System performance issues
- Missing or corrupted data
- Feature not working as expected
- Security concerns
Information to Provide:
- Your user ID and organization
- Detailed description of the issue
- Steps to reproduce the problem
- Screenshots of error messages
- Browser and operating system information
- Error codes or messages from console